
讓我們使用 Spring 框架開始實際的編程。在你開始使用 Spring 框架編寫第一個例子之前,你必須確保已經正確地設置了 Spring 環境,正如在 Spring——環境設置 教程中如所說的。假設你有了解一些有關 Eclipse IDE 工作的知識。
因此,讓我們繼續編寫一個簡單的 Spring 應用程序,它將根據在 Spring Beans 配置文件中配置的信息輸出 “Hello World!” 或其他信息。
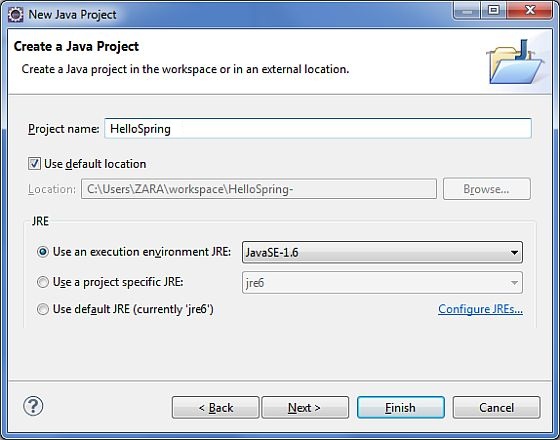
第一步是使用 Eclipse IDE 創建一個簡單的 Java 項目。按照選項 File -> New -> Project,最后從向導列表中選擇 Java Project 向導。現在,使用向導窗口將你的項目命名為 HelloSpring,如下所示:
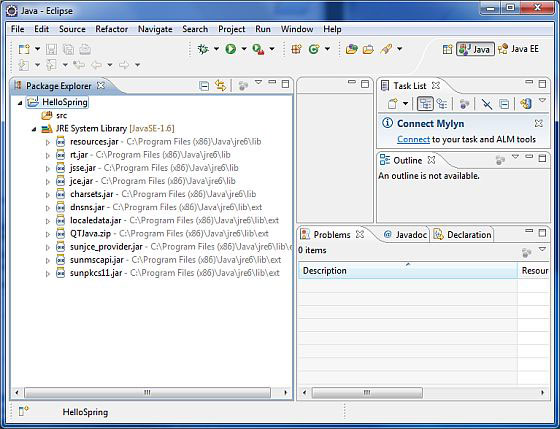
一旦你的項目創建成功后,將在 Project Explorer 看到下面的內容:
第二步讓我們添加 Spring 框架和通用的日志 API 庫到我們的項目中。為了做到這個,在你的項目名稱 HelloSpring 上單擊右鍵,然后在快捷菜單上按照下面可用的選項:Build Path -> Configure Build Path 顯示 Java 構建路徑窗口,如下所示:
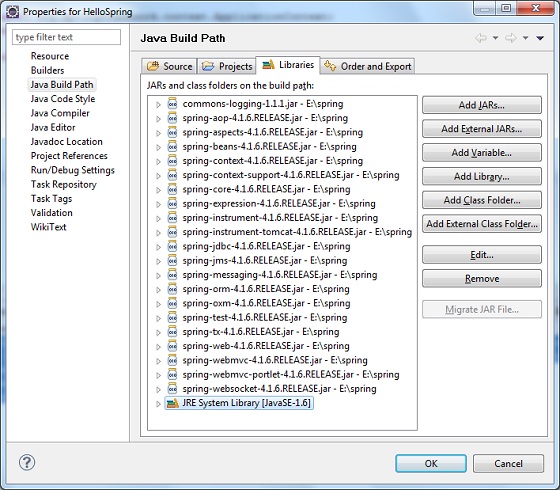
現在,在 Libraries 標簽中使用可用的 Add External JARs 按鈕,添加從 Spring 框架和通用日志安裝目錄下面的核心 JAR 文件:
commons-logging-1.1.1
spring-aop-4.1.6.RELEASE
spring-aspects-4.1.6.RELEASE
spring-beans-4.1.6.RELEASE
spring-context-4.1.6.RELEASE
spring-context-support-4.1.6.RELEASE
spring-core-4.1.6.RELEASE
spring-expression-4.1.6.RELEASE
spring-instrument-4.1.6.RELEASE
spring-instrument-tomcat-4.1.6.RELEASE
spring-jdbc-4.1.6.RELEASE
spring-jms-4.1.6.RELEASE
spring-messaging-4.1.6.RELEASE
spring-orm-4.1.6.RELEASE
spring-oxm-4.1.6.RELEASE
spring-test-4.1.6.RELEASE
spring-tx-4.1.6.RELEASE
spring-web-4.1.6.RELEASE
spring-webmvc-4.1.6.RELEASE
spring-webmvc-portlet-4.1.6.RELEASE
現在讓我們在 HelloSpring 項目下創建實際的源文件。首先,我們需要創建一個名為 com.tutorialspoint 的包。為了做到這個,在 package explore 區域中的 src 上點擊右鍵,并按照選項:New -> Package。
接下來,我們在包 com.tutorialspoint 下創建 HelloWorld.java 和 MainApp.java 文件。
這里是 HelloWorld.java 文件的內容:
package com.tutorialspoint;
public class HelloWorld {
   private String message;
   public void setMessage(String message){
      this.message  = message;
   }
   public void getMessage(){
      System.out.println("Your Message : " + message);
   }
}
下面是第二個文件 MainApp.java 的內容:
package com.tutorialspoint;
import org.springframework.context.ApplicationContext;
import org.springframework.context.support.ClassPathXmlApplicationContext;
public class MainApp {
public static void main(String[] args) {
ApplicationContext context =
new ClassPathXmlApplicationContext("Beans.xml");
HelloWorld obj = (HelloWorld) context.getBean("helloWorld");
obj.getMessage();
}
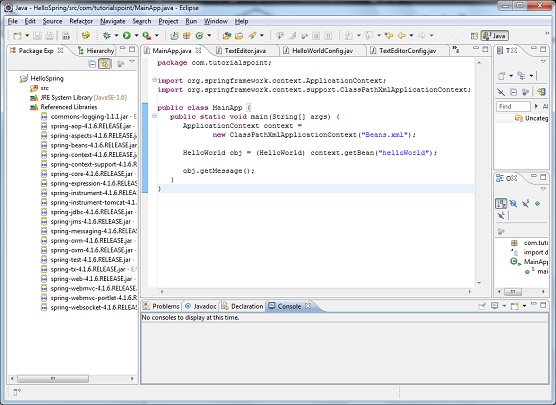
}關于主要程序有以下兩個要點需要注意:
第一步是我們使用框架 API ClassPathXmlApplicationContext() 來創建應用程序的上下文。這個 API 加載 beans 的配置文件并最終基于所提供的 API,它處理創建并初始化所有的對象,即在配置文件中提到的 beans。
你需要創建一個 Bean 的配置文件,該文件是一個 XML 文件,并且作為粘合 bean 的粘合劑即類。這個文件需要在 src 目錄下創建,如下圖所示:
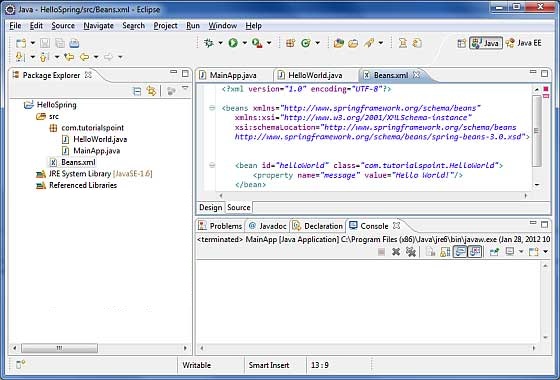
通常開發人員保存該文件的名稱為 Beans.xml 文件,但是你可以單獨選擇你喜歡的任何名稱。你必須確保這個文件在 CLASSPATH 中是可用的,并在主應用程序中使用相同的名稱,而在 MainApp.java 文件中創建應用程序的上下文,如圖所示。
Beans.xml 用于給不同的 bean 分配唯一的 ID,并且控制不同值的對象的創建,而不會影響 Spring 的任何源文件。例如,使用下面的文件,你可以為 “message” 變量傳遞任何值,因此你就可以輸出信息的不同值,而不會影響的 HelloWorld.java和MainApp.java 文件。讓我們來看看它是如何工作的:
<?xml version="1.0" encoding="UTF-8"?>

<beans xmlns="http://www.springframework.org/schema/beans"
    xmlns:xsi="http://www.w3.org/2001/XMLSchema-instance"
    xsi:schemaLocation="http://www.springframework.org/schema/beans
    http://www.springframework.org/schema/beans/spring-beans-3.0.xsd">

   <bean id="helloWorld" class="com.tutorialspoint.HelloWorld">
       <property name="message" value="Hello World!"/>
   </bean>

</beans>
當 Spring 應用程序被加載到內存中時,框架利用了上面的配置文件來創建所有已經定義的 beans,并且按照 標簽的定義為它們分配一個唯一的 ID。你可以使用 標簽來傳遞在創建對象時使用不同變量的值。
一旦你完成了創建源代碼和 bean 的配置文件后,準備好下一步編譯和運行你的程序。為了做到這個,請保持 MainApp.Java 文件標簽是有效的,并且在 Eclipse IDE 中使用可用的 Run 選項,或使用 Ctrl + F11 編譯并運行你的應用程序 MainApp。如果你的應用程序一切都正常,將在 Eclipse IDE 控制臺打印以下信息:
Your Message : Hello World!祝賀,你已經成功地創建了你的第一個 Spring 應用程序。通過更改 “message” 屬性的值并且保持兩個源文件不變,你可以看到上述 Spring 應用程序的靈活性。下一步,我們開始在接下來的幾個章節中做一些更有趣的事情。
程序員人生,我編程,我富裕,記住wfuyu網,php教程,php學習,php手冊,CMS模版制作
聲明:本站大部分內容是作者原創,少部分收集于互聯網供大家一起學習,原版權很多不明,如有侵權請聯系本站,謝謝!
粵ICP備14040726號-1?? 2015-2020 程序員人生 版權所有

