
轉(zhuǎn)載請(qǐng)標(biāo)明出處: http://blog.csdn.net/airsaid/article/details/54294144
本文出自:周游的博客
在前面的博客當(dāng)中,我們學(xué)習(xí)了 View 的1些工作原理知識(shí)等,現(xiàn)在是時(shí)候來寫1波實(shí)例了,畢竟實(shí)踐出真知嘛~ 在開始寫實(shí)例之前,首先來了解下自定義 View 到底有哪幾種吧,然后再根據(jù)每種分別寫1個(gè)簡(jiǎn)單的小栗子。
在我們準(zhǔn)備編寫1個(gè)自定義 View 的時(shí)候,我們需要根據(jù)我們的需求來編寫不同的自定義 View。比如說,如果只是想對(duì) TextView 進(jìn)行擴(kuò)大,那末可以繼承自 TextView 來編寫1個(gè)新的 View,如果想自己定義1個(gè)不同的布局,那末可以繼承 ViewGroup 來實(shí)現(xiàn)。那末到底有多少類的自定義 View 呢?在網(wǎng)上搜了下,發(fā)現(xiàn)大都是說3種、或4種,感覺自定義 View 的分類標(biāo)準(zhǔn)其實(shí)不1,在這里的話還是以主席的為準(zhǔn)分為4類吧,感覺更細(xì)分1些,這4類分別是:
當(dāng)我們需要實(shí)現(xiàn)的效果是1個(gè)不規(guī)則效果的時(shí)候,那末這時(shí)候就需要繼承 View 來實(shí)現(xiàn)了,我們需要重寫 onDraw 方法,在該方法里實(shí)現(xiàn)各種不規(guī)則的圖形和效果。當(dāng)我們使用這類方式的時(shí)候,需要自己去處理 warp_content 和 padding。
當(dāng)系統(tǒng)所提供的 LinearLayout、FrameLayout 等布局控件沒法滿足我們的需求時(shí),這時(shí)候我們就需要使用這類方式來實(shí)現(xiàn)自己想要的布局效果了。當(dāng)我們使用這類方式的時(shí)候,需要重寫 onLayout 方法來對(duì)子 View 進(jìn)行布局,和丈量本身和子 View 寬高,還需要處理本身的 padding 和子 View 的 margin。
當(dāng)我們需要基于已有的 View 進(jìn)行擴(kuò)大或修改的時(shí)候,那末就能夠使用這類方式。比如說,我們需要1個(gè)圓角的 ImageView,那末這時(shí)候就能夠繼承 ImageView 進(jìn)行修改了。當(dāng)我們使用這類方式的時(shí)候,1般不需要自己去處理 wrap_content 和 padding 等,由于系統(tǒng)控件已幫我們做好了。
這類方式也叫做:自定義組合 View。該方式比較簡(jiǎn)單,當(dāng)我們需要將1組 View 組合在1起,方便后期復(fù)用的時(shí)候,就能夠使用該方法。當(dāng)我們使用這類方式的時(shí)候,不需要去處理 ViewGroup 的丈量和布局流程,由于系統(tǒng)控件已幫我們做好了。
上面我們了解了自定義 View 的4種分類,下面我們分別寫4個(gè)與分類對(duì)應(yīng)的小栗子來了解下其各自的寫法,和1些需要注意的問題。
當(dāng)我們自定義 View 繼承子 View 時(shí),我們需要注意的細(xì)節(jié)有:
在這個(gè)實(shí)例當(dāng)中,我們只需簡(jiǎn)單的畫1個(gè)圓便可。重點(diǎn)是細(xì)節(jié)上的處理,寫出1個(gè)規(guī)范的自定義 View。
實(shí)例代碼以下:
public class CircleView extends View {
private Paint mPaint;
/** 圓半徑 */
private float mRadius = 50;
public CircleView(Context context) {
this(context, null);
}
public CircleView(Context context, AttributeSet attrs) {
this(context, attrs, 0);
}
public CircleView(Context context, AttributeSet attrs, int defStyleAttr) {
super(context, attrs, defStyleAttr);
init();
}
private void init() {
// 初始化畫筆
mPaint = new Paint();
mPaint.setColor(Color.BLUE);
}
@Override
protected void onDraw(Canvas canvas) {
super.onDraw(canvas);
int width = getWidth();
int height = getHeight();
canvas.drawCircle(width / 2, height / 2, mRadius, mPaint);
}
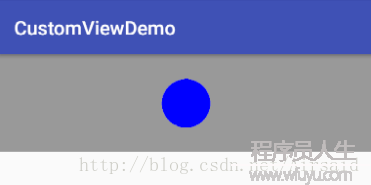
}上面的自定義 View 實(shí)例很簡(jiǎn)單,就是繪制了1個(gè)圓形。放在布局中,運(yùn)行看下效果:
<RelativeLayout
    xmlns:android="http://schemas.android.com/apk/res/android"
    android:layout_width="match_parent"
    android:layout_height="match_parent">

    <com.airsaid.customviewdemo.widget.CircleView
        android:layout_width="match_parent"
        android:layout_height="100dp"
        android:background="#999999"/>

</RelativeLayout
運(yùn)行結(jié)果:
雖然我們已實(shí)現(xiàn)了1個(gè)簡(jiǎn)單的繼承 View 的自定義 View,但該自定義 View 還不是1個(gè)規(guī)范的自定義 View,比如此時(shí)我們把布局改動(dòng)1下,將 View 的寬高改成 wrap_content 和增加 padding 和 margin 屬性:
<com.airsaid.customviewdemo.widget.CircleView
    android:layout_width="wrap_content"
    android:layout_height="wrap_content"
    android:layout_margin="15dp"
    android:background="#999999"
    android:padding="15dp"/>
重新運(yùn)行結(jié)果:
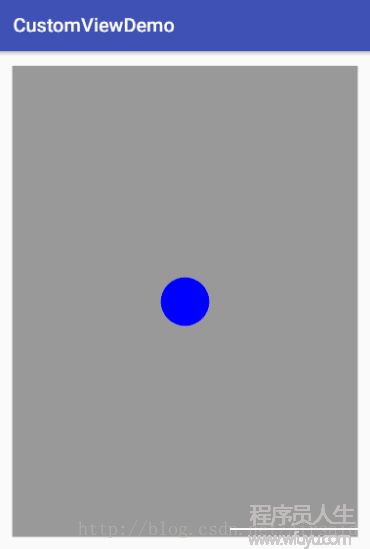
可以看到,雖然我們重新修改了寬高 為 wrap_content,和增加了 padding 和 margin ,但是終究生效的只有 margin。其他的1概沒有生效,而 wrap_content 居然和 match_parent 1樣。這是怎樣1回事呢?
這是由于,margin 是由父控件來控制的,所以我們不需要進(jìn)行處理,但是我們需要對(duì) View 的 padding 和 LayoutParams 是 wrap_content 的情況進(jìn)行處理,否則 padding 將會(huì)沒法生效、wrap_content 的效果會(huì)和 match_parent 1樣,具體產(chǎn)生這樣的緣由可以看深入理解 MeasureSpec這篇文章。
下面我們重寫修改下,在 onDraw 繪制時(shí),加上 padding 值,代碼以下:
@Override
protected void onDraw(Canvas canvas) {
    super.onDraw(canvas);

    int paddingLeft = getPaddingLeft();
    int paddingTop = getPaddingTop();
    int paddingRight = getPaddingRight();
    int paddingBottom = getPaddingBottom();

    int width = getWidth() - paddingLeft - paddingRight;
    int height = getHeight() - paddingTop - paddingBottom;
    canvas.drawCircle(width / 2 + paddingLeft, height / 2 + paddingTop,  mRadius, mPaint);
}
重寫 onMeasure 方法,判斷當(dāng)是 wrap_content 的情況時(shí),自己丈量 View 的寬或高:
@Override
protected void onMeasure(int widthMeasureSpec, int heightMeasureSpec) {
    int widthMode = MeasureSpec.getMode(widthMeasureSpec);
    int widthSize = MeasureSpec.getSize(widthMeasureSpec);
    int heightMode = MeasureSpec.getMode(heightMeasureSpec);
    int heightSize = MeasureSpec.getSize(heightMeasureSpec);

    if(widthMode == MeasureSpec.AT_MOST){
        widthSize = (int) (mRadius * 2 + getPaddingLeft() + getPaddingRight());
    }

    if(heightMode == MeasureSpec.AT_MOST){
        heightSize = (int) (mRadius * 2 + getPaddingTop() + getPaddingBottom());
    }

    setMeasuredDimension(widthSize, heightSize);
}
重新運(yùn)行:
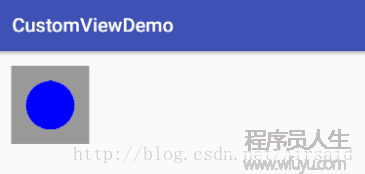
可以看到,padding 和 wrap_content 都已生效了,這時(shí)候候才是1個(gè)規(guī)范的自定義 View,但是此時(shí)這個(gè)自定義 View 其實(shí)不完善,下篇在自定義屬性文章中將會(huì)完善它,給它加入自定義屬性。
當(dāng)我們自定義 View 繼承自 ViewGroup 時(shí),就需要去實(shí)現(xiàn) onLayout 方法來指定子 View 的擺放位置,并且需要重寫 onMeasure 方法來丈量大小。在這個(gè)實(shí)例當(dāng)中,我們簡(jiǎn)單模仿下 LinearLayout ,只不過只實(shí)現(xiàn)其 Vertical 模式,在這個(gè)實(shí)例當(dāng)中,我們需要注意的細(xì)節(jié)有:
作為1個(gè)規(guī)范的自定義 ViewGroup ,這幾個(gè)細(xì)節(jié)我們都需要去處理,下面直接上代碼:
/**
 * 作者: 周游
 * 時(shí)間: 2017/1/8
 * 博客: http://blog.csdn.net/airsaid
 * 描寫: 1個(gè)繼承 ViewGroup 的自定義 View 入門實(shí)例,該 ViewGroup 垂直擺放子 View。
 */
public class SimpleVerticalLayout extends ViewGroup {

    private final Context mContext;

    public SimpleVerticalLayout(Context context) {
        this(context, null);
    }

    public SimpleVerticalLayout(Context context, AttributeSet attrs) {
        this(context, attrs, 0);
    }

    public SimpleVerticalLayout(Context context, AttributeSet attrs, int defStyleAttr) {
        super(context, attrs, defStyleAttr);
        mContext = context;
    }

    @Override
    protected void onMeasure(int widthMeasureSpec, int heightMeasureSpec) {
        // 獲得 ViewGroup 的丈量模式、大小。
        int widthMode = MeasureSpec.getMode(widthMeasureSpec);
        int widthSize = MeasureSpec.getSize(widthMeasureSpec);
        int heightMode = MeasureSpec.getMode(heightMeasureSpec);
        int heightSize = MeasureSpec.getSize(heightMeasureSpec);

        // 獲得 ViewGroup 的 padding 值
        int pl = getPaddingLeft();
        int pt = getPaddingTop();
        int pr = getPaddingRight();
        int pb = getPaddingBottom();

        // 丈量所有子 View,當(dāng)丈量后才能獲得到子 View 的丈量寬高
        measureChildren(widthMeasureSpec, heightMeasureSpec);

        // 自己計(jì)算的 ViewGroup 的寬高
        int width = 0;
        int height = 0;

        // 判斷如果 ViewGroup 的寬度是 wrap_content
        if(widthMode == MeasureSpec.AT_MOST){
            // 計(jì)算 ViewGroup 的寬度,遍歷所有子 View,最寬的那個(gè) View 的寬度就是 ViewGroup 的寬度
            int maxWidth = 0;
            for (int i = 0; i < getChildCount(); i++) {
                View childAt = getChildAt(i);
                if(childAt.getVisibility() == View.GONE){
                    continue;
                }

                MarginLayoutParams lp = (MarginLayoutParams) childAt.getLayoutParams();
                int childWidth = childAt.getMeasuredWidth() + lp.leftMargin + lp.rightMargin;
                maxWidth = childWidth > maxWidth ? childWidth : maxWidth;
            }
            width = maxWidth + pl + pr;
        }

        // 判斷如果 ViewGroup 的高度是 wrap_content
        if(heightMode == MeasureSpec.AT_MOST){
            // 計(jì)算 ViewGroup 的高度,由因而垂直擺放,所以高度為每一個(gè)子 View 的高度和
            for (int i = 0; i < getChildCount(); i++) {
                View childAt = getChildAt(i);
                if(childAt.getVisibility() == View.GONE){
                    continue;
                }

                MarginLayoutParams lp = (MarginLayoutParams) childAt.getLayoutParams();
                height += childAt.getMeasuredHeight() + lp.topMargin + lp.bottomMargin;
            }
            height = height + pt + pb;
        }

        setMeasuredDimension(widthMode == MeasureSpec.AT_MOST ? width : widthSize
                , heightMode == MeasureSpec.AT_MOST ? height : heightSize);
    }

    @Override
    protected void onLayout(boolean changed, int l, int t, int r, int b) {
        int pl = getPaddingLeft();
        int pt = getPaddingTop();
        int pr = getPaddingRight();
        int pb = getPaddingBottom();


        int cl = 0;
        int ct = 0;
        int cr = 0;
        int cb = 0;
        int bm = 0;

        // 遍歷所有子 View
        int childCount = getChildCount();

        for (int i = 0; i < childCount; i++) {
            // 獲得子 View
            View childAt = getChildAt(i);
            // 判斷當(dāng)子 View 沒有 Gone 掉時(shí)
            if(childAt.getVisibility() != View.GONE){
                // 計(jì)算每一個(gè)子 View 的位置
                MarginLayoutParams lp = (MarginLayoutParams) childAt.getLayoutParams();
                cl = lp.leftMargin;
                ct += lp.topMargin;
                cr = childAt.getMeasuredWidth() + lp.leftMargin;
                cb += childAt.getMeasuredHeight() + lp.topMargin;
                // 對(duì)子 View 進(jìn)行布局
                childAt.layout(cl + pl, ct + pt + bm, cr + pr, cb + pb + bm);
                ct += childAt.getMeasuredHeight();
                bm += lp.bottomMargin;
            }
        }
    }

    @Override
    public LayoutParams generateLayoutParams(AttributeSet attrs) {
        return new MarginLayoutParams(mContext, attrs);
    }
}
上面的代碼實(shí)現(xiàn)的很簡(jiǎn)單,并且注釋也很詳細(xì)。我們直接放到布局中看看效果:
<com.airsaid.customviewdemo.widget.SimpleVerticalLayout
    android:layout_width="wrap_content"
    android:layout_height="wrap_content"
    android:background="#999999"
    android:padding="10dp">

    <TextView
        android:layout_width="wrap_content"
        android:layout_height="wrap_content"
        android:layout_margin="10dp"
        android:background="#ff0000"
        android:text="我是第1個(gè)子 View"/>

    <TextView
        android:layout_width="wrap_content"
        android:layout_height="wrap_content"
        android:background="#ffff00"
        android:text="我是第2個(gè)子 View"/>

    <TextView
        android:layout_width="wrap_content"
        android:layout_height="wrap_content"
        android:background="#ffffff"
        android:text="我是第3個(gè)子 View"/>
</com.airsaid.customviewdemo.widget.SimpleVerticalLayout>
運(yùn)行結(jié)果:
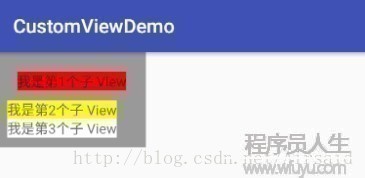
可以看到,SimpleVerticalLayout 的 padding,和子 View 的 margin 都是生效的。
當(dāng)我們自定義 View 繼承自系統(tǒng)已有 View 時(shí),1般是基于其原有功能進(jìn)行擴(kuò)大或修改。比如這個(gè)實(shí)例當(dāng)中,我們對(duì)原本的 EditText 進(jìn)行擴(kuò)大,增加1個(gè)有內(nèi)容時(shí)顯示刪除按鈕,點(diǎn)擊按鈕清空文本的 EditText,實(shí)例很簡(jiǎn)單,仍然直接貼代碼了:
/**
 * 作者: 周游
 * 時(shí)間: 2017/1/9
 * 博客: http://blog.csdn.net/airsaid
 * 描寫: 1個(gè)繼承已有 View 的自定義 View 實(shí)例,帶清除按鈕的 EditText。
 */
public class CleanEditText extends EditText{

    private final Context mContext;
    private Drawable mDeleteDrawable;

    public CleanEditText(Context context) {
        this(context, null);
    }

    public CleanEditText(Context context, AttributeSet attrs) {
        this(context, attrs, 0);
    }

    public CleanEditText(Context context, AttributeSet attrs, int defStyleAttr) {
        super(context, attrs, defStyleAttr);
        mContext = context;

        // 設(shè)置右邊刪除圖標(biāo)
        mDeleteDrawable = getResources().getDrawable(R.mipmap.ic_delete);
        // 添加監(jiān)聽
        addTextChangedListener(new TextWatcher() {
            @Override
            public void beforeTextChanged(CharSequence s, int start, int count, int after) {}

            @Override
            public void onTextChanged(CharSequence s, int start, int before, int count) {}

            @Override
            public void afterTextChanged(Editable s) {
                setDeleteDrawable();
            }
        });
        setDeleteDrawable();
    }

    private void setDeleteDrawable() {
        setCompoundDrawablesWithIntrinsicBounds(null, null, length() > 0 ? mDeleteDrawable : null, null);
    }

    @Override
    public boolean onTouchEvent(MotionEvent event) {
        if(event.getAction() == MotionEvent.ACTION_UP){
            if(mDeleteDrawable != null){
                int rawX = (int) event.getRawX();
                int rawY = (int) event.getRawY();
                Rect rect = new Rect();
                getGlobalVisibleRect(rect);
                rect.left = rect.right - 50;
                if(rect.contains(rawX, rawY))
                    setText("");
            }
        }
        return super.onTouchEvent(event);
    }
}
運(yùn)行結(jié)果:
這類自定義 View 的實(shí)現(xiàn)方式也叫做:“自定義組合控件”,是1種比較簡(jiǎn)單的自定義 View 方式。使用這類方式時(shí),由因而繼承已有的系統(tǒng)控件,所以我們不需去丈量、布局、處理 margin、padding等,由于系統(tǒng)控件本身已處理好了。
當(dāng)我們的項(xiàng)目中有1些布局在很多地方都要用到的話,那末第1時(shí)間肯定就要想到復(fù)用了。復(fù)用的話,有人可能會(huì)想到使用 include 復(fù)用布局,但是如果這樣的話,當(dāng)布局改動(dòng)性很大時(shí),使用 include 其實(shí)不是很靈活。這時(shí)候候,就能夠使用 ”繼承已有 ViewGroup“ 這類方式了。
下面1個(gè)實(shí)例,就拿我們平時(shí)可能常常要寫的 Item 為例吧:
/**
 * 作者: 周游
 * 時(shí)間: 2017/1/9
 * 博客: http://blog.csdn.net/airsaid
 * 描寫: 1個(gè)繼承已有 ViewGroup 的自定義 View 實(shí)例,經(jīng)常使用 item 布局。
 */
public class CustomItemLayout extends FrameLayout {

    private TextView mTxtLeft;
    private TextView mTxtRight;
    private ImageView mImgRight;

    private Context mContext;
    // 左邊文字
    private String mLeftText;
    // 右邊文字
    private String mRightText;
    // 右邊文字色彩
    private int mRightTextColor = Color.parseColor("#666666");
    // 右邊圖片
    private int mRightImageId = R.mipmap.ic_arrow_right;
    // 左邊圖片
    private Drawable mLeftImage = null;

    public CustomItemLayout(Context context) {
        this(context, null);
    }

    public CustomItemLayout(Context context, AttributeSet attrs) {
        this(context, attrs, 0);
    }

    public CustomItemLayout(Context context, AttributeSet attrs, int defStyleAttr) {
        super(context, attrs, defStyleAttr);
        mContext = context;
        initAttrs(attrs);
        initView();
        setData();
    }

    private void initAttrs(AttributeSet attrs) {
        // 獲得自定義屬性
        TypedArray a = mContext.obtainStyledAttributes(attrs, R.styleable.CustomItemLayout);
        mLeftText = a.getString(R.styleable.CustomItemLayout_item_leftText);
        mRightText = a.getString(R.styleable.CustomItemLayout_item_rightText);
        mRightTextColor = a.getColor(R.styleable.CustomItemLayout_item_rightTextColor, mRightTextColor);
        mRightImageId = a.getResourceId(R.styleable.CustomItemLayout_item_rightImage, mRightImageId);
        mLeftImage = a.getDrawable(R.styleable.CustomItemLayout_item_leftImage);
        a.recycle();
    }

    private void initView() {
        // 加載自定義布局到當(dāng)前 ViewGroup
        LayoutInflater.from(mContext).inflate(R.layout.view_custom_item_layout, this);
        mTxtLeft = (TextView) findViewById(R.id.txt_left);
        mTxtRight = (TextView) findViewById(R.id.txt_right);
        mImgRight = (ImageView) findViewById(R.id.img_right);
    }

    private void setData() {
        if(mLeftText != null)   mTxtLeft.setText(mLeftText);
        if(mRightText != null)  mTxtRight.setText(mRightText);
        setRightImage(mRightImageId);
        if(mLeftImage != null)
            mLeftImage.setBounds(0, 0, dp2px(22), dp2px(12));
        mTxtLeft.setCompoundDrawables(null, null, mLeftImage, null);
    }

    public void setRightTextColor(int resId){
        mTxtRight.setTextColor(resId);
    }

    public void setRightText(String text){
        mTxtRight.setText(text);
    }

    public void setRightText(int resId){
        mTxtRight.setText(resId);
    }

    public String getRightText(){
        return mTxtRight.getText().toString();
    }

    public void setLeftImage(int leftImageId){
        mLeftImage = getResources().getDrawable(leftImageId);
        setData();
    }

    public void setRightImage(int rightImageId){
        if(rightImageId != -1){
            mImgRight.setVisibility(View.VISIBLE);
            mImgRight.setImageResource(rightImageId);
        }else{
            mImgRight.setVisibility(View.GONE);
        }
    }

    private int dp2px(float dpValue){
        return (int)(dpValue * (getResources().getDisplayMetrics().density) + 0.5f);
    }
}
首先自定義1個(gè)類,繼承自 FrameLayout,固然,這里你也能夠選擇繼承 LinearLayout 或其他,根據(jù)具體需求來。其中在構(gòu)造中獲得了自定義屬性,和填充了布局。自定義屬性有不懂的同學(xué)可以先疏忽,下篇會(huì)單獨(dú)拿出來寫1篇。
最主要的地方就是填充布局那里,將布局填充到了當(dāng)前控件也就是自定義的 ViewGroup 上。填充的布局以下:
<?xml version="1.0" encoding="utf⑻"?>
<LinearLayout xmlns:android="http://schemas.android.com/apk/res/android"
              android:layout_width="match_parent"
              android:layout_height="wrap_content"
              android:background="?android:selectableItemBackground"
              android:gravity="center_vertical"
              android:padding="15dp">

    <TextView
        android:id="@+id/txt_left"
        android:layout_width="wrap_content"
        android:layout_height="wrap_content"
        android:drawablePadding="5dp"
        android:ellipsize="end"
        android:maxLines="1"
        android:textColor="@color/text_black"
        android:textSize="@dimen/txt14"/>

    <TextView
        android:id="@+id/txt_right"
        android:layout_width="0dp"
        android:layout_height="wrap_content"
        android:layout_marginLeft="10dp"
        android:layout_weight="1"
        android:ellipsize="end"
        android:gravity="right"
        android:maxLines="1"
        android:textSize="@dimen/txt14"/>

    <ImageView
        android:id="@+id/img_right"
        android:layout_width="wrap_content"
        android:layout_height="wrap_content"
        android:layout_marginLeft="5dp"
        android:src="@mipmap/ic_arrow_right"/>
</LinearLayout>
使用時(shí),可以直接在布局中通過自定義屬性設(shè)置數(shù)據(jù):
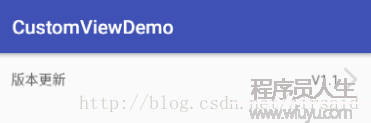
<com.airsaid.customviewdemo.widget.CustomItemLayout
    android:layout_width="match_parent"
    android:layout_height="wrap_content"
    app:item_leftText="版本更新"
    app:item_rightImage="@mipmap/ic_arrow_right"
    app:item_rightText="V1.1"/>
也能夠通過暴露的方法設(shè)置數(shù)據(jù),怎樣方便怎樣來。
運(yùn)行結(jié)果:
CSDN:http://download.csdn.net/detail/airsaid/9733175

程序員人生,我編程,我富裕,記住wfuyu網(wǎng),php教程,php學(xué)習(xí),php手冊(cè),CMS模版制作
聲明:本站大部分內(nèi)容是作者原創(chuàng),少部分收集于互聯(lián)網(wǎng)供大家一起學(xué)習(xí),原版權(quán)很多不明,如有侵權(quán)請(qǐng)聯(lián)系本站,謝謝!
粵ICP備14040726號(hào)-1?? 2015-2020 程序員人生 版權(quán)所有


