
我們通常所說的沉醉式狀態欄,其實叫法其實不正確,準確來講應當叫透明狀態欄,這個不多說,很多大神都已說過了。那我們就來看看市面上的App使用了“沉醉式”狀態欄。
大致分為兩類:
1種是通過設置狀態欄的色彩與app相同
例如QQ

另外一種是讓狀態欄和全部app使用同1張圖片

不管那種方式,目的都只有1個,讓用戶覺得狀態欄和全部App是1體的,而不是系統單獨出來的1部份,從而到達所謂沉醉式的效果。
不管那種方法只有在Android在4.4以后才可以實現,并且現在國產手機基本上都是4.4以上,新生產的手機6.0都是標配,所以4.4之前的暫不斟酌兼容,接下來就來看看是怎樣實現的。
getWindow().addFlags(WindowManager.LayoutParams.FLAG_TRANSLUCENT_STATUS);//獲得填充的statusView
LayoutInflater layoutInflater = LayoutInflater.from(this);
View statusBarView = layoutInflater.inflate(R.layout.statusbar, null);
int resourceId = getResources().getIdentifier("status_bar_height", "dimen", "android");
int statusBarHeight = getResources().getDimensionPixelSize(resourceId);
LinearLayout.LayoutParams params = new LinearLayout.LayoutParams(ViewGroup.LayoutParams.MATCH_PARENT,
statusBarHeight);
statusBarView.setLayoutParams(params);R.layout.statusbar布局
<?xml version="1.0" encoding="utf⑻"?>
<LinearLayout xmlns:android="http://schemas.android.com/apk/res/android"
android:id="@+id/id_linearLayout"
android:layout_width="match_parent"
android:layout_height="match_parent"
android:background="@color/colorPrimary"
android:orientation="vertical">
</LinearLayout>// 添加 statusView 到布局中
ViewGroup decorView = (ViewGroup) getWindow().getDecorView();
decorView.addView(statusBarView); android:fitsSystemWindows="true"
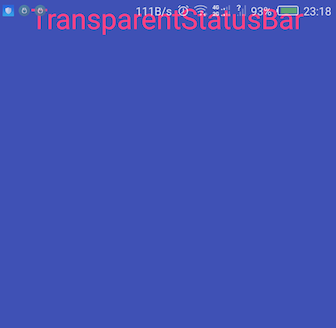
android:clipToPadding="true"運行效果以下圖
完全代碼
public class MainActivity extends AppCompatActivity {
@Override
protected void onCreate(Bundle savedInstanceState) {
super.onCreate(savedInstanceState);
setContentView(R.layout.activity_main);
if (Build.VERSION.SDK_INT >= Build.VERSION_CODES.KITKAT) {
//讓利用充滿StatusBar
getWindow().addFlags(WindowManager.LayoutParams.FLAG_TRANSLUCENT_STATUS);
// //設置透明導航欄
// getWindow().addFlags(WindowManager.LayoutParams.FLAG_TRANSLUCENT_NAVIGATION);
//獲得填充的statusView
            LayoutInflater layoutInflater = LayoutInflater.from(this);
            View statusBarView = layoutInflater.inflate(R.layout.statusbar, null);
            int resourceId = getResources().getIdentifier("status_bar_height", "dimen", "android");
            int statusBarHeight = getResources().getDimensionPixelSize(resourceId);
            LinearLayout.LayoutParams params = new LinearLayout.LayoutParams(ViewGroup.LayoutParams.MATCH_PARENT,
                    statusBarHeight);
            statusBarView.setLayoutParams(params);
// 添加 statusView 到布局中
            ViewGroup decorView = (ViewGroup) getWindow().getDecorView();
            decorView.addView(statusBarView);
}
}
}<?xml version="1.0" encoding="utf⑻"?>
<RelativeLayout xmlns:android="http://schemas.android.com/apk/res/android"
xmlns:tools="http://schemas.android.com/tools"
android:layout_width="match_parent"
android:layout_height="match_parent"
android:background="@color/colorPrimary"
    android:fitsSystemWindows="true"
    android:clipToPadding="true"
tools:context="cn.sq.transparentstatusbardemo.MainActivity">
<TextView
android:layout_width="match_parent"
android:layout_height="wrap_content"
android:gravity="center_horizontal"
android:text="TransparentStatusBar"
android:textSize="30dp"
android:textColor="@color/colorAccent"/>
</RelativeLayout>在Activity中為窗體AddFlag “FLAG_TRANSLUCENT_STATUS”
if(Build.VERSION.SDK_INT>=Build.VERSION_CODES.KITKAT){
//設置透明狀態欄 getWindow().addFlags(WindowManager.LayoutParams.FLAG_TRANSLUCENT_STATUS);
//設置透明導航欄 getWindow().addFlags(WindowManager.LayoutParams.FLAG_TRANSLUCENT_NAVIGATION);
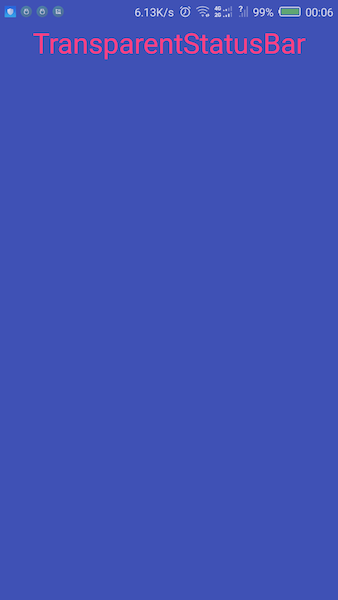
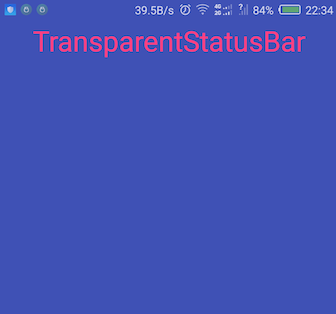
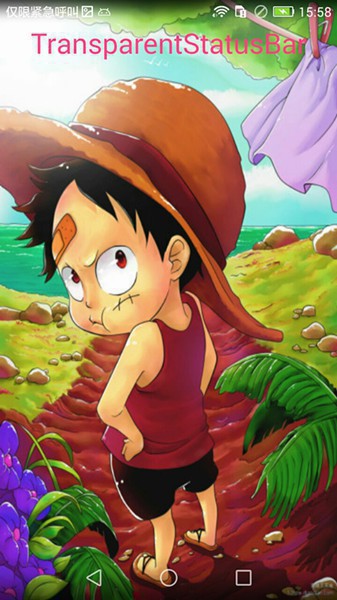
}分別設置圖片和純色設置后運行結果以下圖
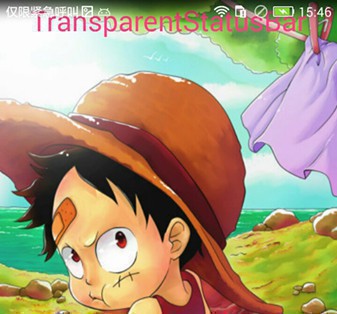
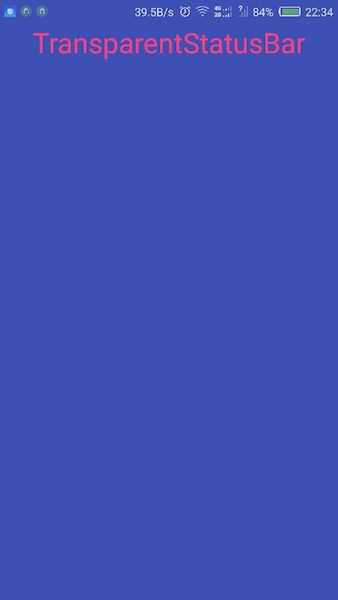
運行后發現布局全部向上偏移,占據了狀態欄的位置,不用著急,只需要在布局中設置屬性便可
需要給根布局添加兩個屬性
    android:fitsSystemWindows="true"
    android:clipToPadding="true"
運行結果以下圖
完全代碼
Activity
public class MainActivity extends AppCompatActivity {

    @Override
    protected void onCreate(Bundle savedInstanceState) {
        super.onCreate(savedInstanceState);
        setContentView(R.layout.activity_main);

        if(Build.VERSION.SDK_INT>=Build.VERSION_CODES.KITKAT){
            //設置透明狀態欄
            getWindow().addFlags(WindowManager.LayoutParams.FLAG_TRANSLUCENT_STATUS);
            //設置透明導航欄
//            getWindow().addFlags(WindowManager.LayoutParams.FLAG_TRANSLUCENT_NAVIGATION);
        }
    }
}
布局文件
<?xml version="1.0" encoding="utf⑻"?>
<RelativeLayout xmlns:android="http://schemas.android.com/apk/res/android"
    xmlns:tools="http://schemas.android.com/tools"
    android:layout_width="match_parent"
    android:layout_height="match_parent"
    android:background="@mipmap/luffy"
    android:fitsSystemWindows="true"
    android:clipToPadding="true"
    tools:context="com.drision.transparentstatusbardemo.MainActivity">

    <TextView
        android:layout_width="match_parent"
        android:layout_height="wrap_content"
        android:gravity="center_horizontal"
        android:text="TransparentStatusBar"
        android:textSize="30dp"
        android:textColor="@color/colorAccent"/>
</RelativeLayout>
另外一個布局文件中根布局的 backgroudnd屬性設置為:
android:background=”@color/colorPrimary”
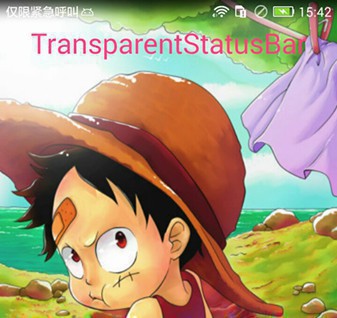
與狀態欄相同設置類似,也能設置透明導航欄,這個功能僅適用于采取虛擬鍵盤的手機。
設置方法:把activity中注釋的代碼放出來就好了,運行效果以下

程序員人生,我編程,我富裕,記住wfuyu網,php教程,php學習,php手冊,CMS模版制作
聲明:本站大部分內容是作者原創,少部分收集于互聯網供大家一起學習,原版權很多不明,如有侵權請聯系本站,謝謝!
粵ICP備14040726號-1?? 2015-2020 程序員人生 版權所有


