
Android中的AMS想必是做android開發的工程師耳熟能詳的系統級別的服務,但是它又是如此地龐大(單單ActivityManagerService.java文件就2W+行代碼),因此我們在學習它的時候總是不能找到實際的主線,很是混亂。這里我會連續寫幾篇文章從它的啟動進程,主要業務邏輯,和別的模塊之間的互操作邏輯等角度來向大家簡單介紹1下它。這里我只能是拋磚引玉,簡單介紹,不會四平八穩,由于AMS的代碼量確切比較大,如果向大家逐一道來,想必大家1定會厭煩而且學習效果不好。希望大家在瀏覽本文的時候,同時查看android相干源碼,自己動手,自己思考,你會有很大的提高的!
注:本文的所有的分析全部基于google最新的android 6.0.0進行的,6.0之前的版本可能有很多地方不1致,請知悉。
好了下面,我們就開始從頭分析1下AMS,首先從AMS的啟動流程開始。
Android中的很多使用java語言編寫的service都是在SystemServer中啟動的,SystemServer是由系統啟動的時候zygote啟動的第1個java程序。AMS的是在SystemServer中的startBootstrapServices方法中啟動的,android系統中的很多核心關鍵服務都是在這個函數中啟動的,這個方法中有這么1段代碼:
startBootstrapServices@SystemServer.java:
// Activity manager runs the show.
mActivityManagerService = mSystemServiceManager.startService(
ActivityManagerService.Lifecycle.class).getService();
mActivityManagerService.setSystemServiceManager(mSystemServiceManager);
mActivityManagerService.setInstaller(installer);
這里調用了mSystemServiceManager對象的startService啟動了AMS,注意這里給出的參數是ActivityManagerService.Lifecycle.class,在進1步分析startService之前,我們需要看1下這個類:
Lifecycle@ActivityManagerService.java
public static final class Lifecycle extends SystemService {
    private final ActivityManagerService mService;

    public Lifecycle(Context context) {
        super(context);
        mService = new ActivityManagerService(context);
    }

    @Override
    public void onStart() {
        mService.start();
    }

    public ActivityManagerService getService() {
        return mService;
    }
}
從這個類的名字就能夠看出來,這是1個關于AMS的生命周期的內部類,構造器中實例化了1個AMS的對象。同時這個類繼承自SystemService類(這是所有系統級別服務都應當繼承的父類,主要定義了1些關于生命周期和上下文的接口),并且復寫了onStart方法:
onStart@SystemService.java
/**
* Called when the dependencies listed in the @Service class-annotation are available
* and after the chosen start phase.
* When this method returns, the service should be published.
*/
public abstract void onStart();
可以看出來,這是當服務啟動的時候回調的方法,具體再哪里調用,我們后面會分析。弄清楚了Lifecycle類以后,我們現在可以來分析mSystemServiceManager對象的startService方法,mSystemServiceManager是SystemServiceManager類的1個對象,下面是startService方法:
startService@SystemServiceManager.java
    /**
     * Creates and starts a system service. The class must be a subclass of
     * {@link com.android.server.SystemService}.
     *
     * @param serviceClass A Java class that implements the SystemService interface.
     * @return The service instance, never null.
     * @throws RuntimeException if the service fails to start.
     */
    @SuppressWarnings("unchecked")
    public <T extends SystemService> T startService(Class<T> serviceClass) {
        final String name = serviceClass.getName();
        Slog.i(TAG, "Starting " + name);

        // Create the service.
        if (!SystemService.class.isAssignableFrom(serviceClass)) {
            throw new RuntimeException("Failed to create " + name
                    + ": service must extend " + SystemService.class.getName());
        }
        final T service;
        try {
            Constructor<T> constructor = serviceClass.getConstructor(Context.class);
            service = constructor.newInstance(mContext);
        } catch (InstantiationException ex) {
            throw new RuntimeException("Failed to create service " + name
                    + ": service could not be instantiated", ex);
        } catch (IllegalAccessException ex) {
            throw new RuntimeException("Failed to create service " + name
                    + ": service must have a public constructor with a Context argument", ex);
        } catch (NoSuchMethodException ex) {
            throw new RuntimeException("Failed to create service " + name
                    + ": service must have a public constructor with a Context argument", ex);
        } catch (InvocationTargetException ex) {
            throw new RuntimeException("Failed to create service " + name
                    + ": service constructor threw an exception", ex);
        }

        // Register it.
        mServices.add(service);

        // Start it.
        try {
            service.onStart();
        } catch (RuntimeException ex) {
            throw new RuntimeException("Failed to start service " + name
                    + ": onStart threw an exception", ex);
        }
        return service;
    }
這里我們需要說明1下,在上面調用這個方法的時候,我們傳遞進來的參數是1個類,而不是這個類的對象,也就是說我們僅僅給出了類型并沒有進行實例化!因此這里的方法參數是1個泛型。在這個方法中我們首先取得傳遞進來類的名字,然落后行1個很重要的操作,那就是java類型判斷,使用isAssignableFrom完成,isAssignableFrom和instanceof類似,只是instanceof針對類的對象進行判斷,而isAssignableFrom針對類進行判斷,也就是說這是在只有類而沒有類的對象的時候進行判斷類之間的繼承關系的方式。更多關于isAssignableFrom和instanceof的區分請看博客:
http://blog.csdn.net/kjfcpua/article/details/7045207
我們這里判斷了傳遞進來的類是否是SystemService類的子類,如果不是的話直接刨除運行時異常立即停止運行,由于服務必須繼承自SystemService類!代碼中的異常信息也能夠看到這1點。接下來,就取得類的構造器,并且實例化1個對象:
// 取得構造器
Constructor<T> constructor = serviceClass.getConstructor(Context.class);
// 實例化1個對象
service = constructor.newInstance(mContext);
現在我們需要看1下實例化的時候做了甚么工作,下面是Lifecycle類的構造器:
public Lifecycle(Context context) {
    super(context);
    mService = new ActivityManagerService(context);
}
我們可以看到,這里實例化了1個ActivityManagerService類的對象,我們看1下ActivityManagerService類的構造器:
    // Note: This method is invoked on the main thread but may need to attach various
    // handlers to other threads.  So take care to be explicit about the looper.
    public ActivityManagerService(Context systemContext) {
        mContext = systemContext;
        mFactoryTest = FactoryTest.getMode();
        mSystemThread = ActivityThread.currentActivityThread();

        Slog.i(TAG, "Memory class: " + ActivityManager.staticGetMemoryClass());

        mHandlerThread = new ServiceThread(TAG,
                android.os.Process.THREAD_PRIORITY_FOREGROUND, false /*allowIo*/);
        mHandlerThread.start();
        mHandler = new MainHandler(mHandlerThread.getLooper());
        mUiHandler = new UiHandler();

        mFgBroadcastQueue = new BroadcastQueue(this, mHandler,
                "foreground", BROADCAST_FG_TIMEOUT, false);
        mBgBroadcastQueue = new BroadcastQueue(this, mHandler,
                "background", BROADCAST_BG_TIMEOUT, true);
        mBroadcastQueues[0] = mFgBroadcastQueue;
        mBroadcastQueues[1] = mBgBroadcastQueue;

        mServices = new ActiveServices(this);
        mProviderMap = new ProviderMap(this);

        // TODO: Move creation of battery stats service outside of activity manager service.
        File dataDir = Environment.getDataDirectory();
        File systemDir = new File(dataDir, "system");
        systemDir.mkdirs();
        mBatteryStatsService = new BatteryStatsService(systemDir, mHandler);
        mBatteryStatsService.getActiveStatistics().readLocked();
        mBatteryStatsService.scheduleWriteToDisk();
        mOnBattery = DEBUG_POWER ? true
                : mBatteryStatsService.getActiveStatistics().getIsOnBattery();
        mBatteryStatsService.getActiveStatistics().setCallback(this);

        mProcessStats = new ProcessStatsService(this, new File(systemDir, "procstats"));

        mAppOpsService = new AppOpsService(new File(systemDir, "appops.xml"), mHandler);

        mGrantFile = new AtomicFile(new File(systemDir, "urigrants.xml"));

        // User 0 is the first and only user that runs at boot.
        mStartedUsers.put(UserHandle.USER_OWNER, new UserState(UserHandle.OWNER, true));
        mUserLru.add(UserHandle.USER_OWNER);
        updateStartedUserArrayLocked();

        GL_ES_VERSION = SystemProperties.getInt("ro.opengles.version",
            ConfigurationInfo.GL_ES_VERSION_UNDEFINED);

        mTrackingAssociations = "1".equals(SystemProperties.get("debug.track-associations"));

        mConfiguration.setToDefaults();
        mConfiguration.setLocale(Locale.getDefault());

        mConfigurationSeq = mConfiguration.seq = 1;
        mProcessCpuTracker.init();

        mCompatModePackages = new CompatModePackages(this, systemDir, mHandler);
        mIntentFirewall = new IntentFirewall(new IntentFirewallInterface(), mHandler);
        mRecentTasks = new RecentTasks(this);
        mStackSupervisor = new ActivityStackSupervisor(this, mRecentTasks);
        mTaskPersister = new TaskPersister(systemDir, mStackSupervisor, mRecentTasks);

        mProcessCpuThread = new Thread("CpuTracker") {
            @Override
            public void run() {
                while (true) {
                    try {
                        try {
                            synchronized(this) {
                                final long now = SystemClock.uptimeMillis();
                                long nextCpuDelay = (mLastCpuTime.get()+MONITOR_CPU_MAX_TIME)-now;
                                long nextWriteDelay = (mLastWriteTime+BATTERY_STATS_TIME)-now;
                                //Slog.i(TAG, "Cpu delay=" + nextCpuDelay
                                //        + ", write delay=" + nextWriteDelay);
                                if (nextWriteDelay < nextCpuDelay) {
                                    nextCpuDelay = nextWriteDelay;
                                }
                                if (nextCpuDelay > 0) {
                                    mProcessCpuMutexFree.set(true);
                                    this.wait(nextCpuDelay);
                                }
                            }
                        } catch (InterruptedException e) {
                        }
                        updateCpuStatsNow();
                    } catch (Exception e) {
                        Slog.e(TAG, "Unexpected exception collecting process stats", e);
                    }
                }
            }
        };

        Watchdog.getInstance().addMonitor(this);
        Watchdog.getInstance().addThread(mHandler);
    }
這個構造器比較長,并且基本都是1些AMS平常工作的初始化,因此我們這里就不詳細分析構造器的工作了,后面分析AMS的服務邏輯的時候我們在來分析對應的初始化工作。現在我們只要知道在AMS的構造器中做了這些工作就能夠了:
1. 創建1堆類的對象,這些對象對AMS的平常工作來講是必須的。
2. 初始化battery stats相干服務,AMS除負責activity的管理工作,還負責battery stats相干的工作
3. 初始化cpu統計相干服務,主要是啟動1個線程,輪詢處理。為AMS提供有關CPU運行統計方面數據做準備。
最落后行這個方法中最重要的操作,那就是將服務添加到ServiceManager中去,方面別的進程使用Binder查找到這個服務:
// Register it.
mServices.add(service);
需要注意的是,這里的添加注冊服務其實不是Binder添加注冊服務,我們看1下mServices的類型就知道了:
// Services that should receive lifecycle events.
private final ArrayList<SystemService> mServices = new ArrayList<SystemService>();
是的,mServices就是1個列表,這個列表中包括了它啟動的所有SystemService類的服務,以便于后面調用它的生命周期方法。
接下來的操作就是回調我們前面提到的onStart方法:
// Start it.
try {
    service.onStart();
} catch (RuntimeException ex) {
    throw new RuntimeException("Failed to start service " + name
            + ": onStart threw an exception", ex);
}
這里就回調到了AMS中Lifecycle內部類的onStart方法了,最后就是將實例化的service返回。接下來我們先分析1下Lifecycle的onStart:
@Override
public void onStart() {
    mService.start();
}
我們看到,這里直接調用ActivityManagerService的start方法:
start@ActivityManagerService.java
private void start() {
    Process.removeAllProcessGroups();
    mProcessCpuThread.start();

    mBatteryStatsService.publish(mContext);
    mAppOpsService.publish(mContext);
    Slog.d("AppOps", "AppOpsService published");
    LocalServices.addService(ActivityManagerInternal.class, new LocalService());
}
這里有的人可能覺得奇怪,怎樣這個start是1個private方法?上面使用mService.start();能訪問嗎?是的,可以訪問的,雖然它是1個私有方法!這里可以參考本人的另外一篇文章:
http://blog.csdn.net/baniel01/article/details/51776120
這里的start方法很是簡單,首先是調用Process類的removeAllProcessGroups方法移除所有的進程組,清空所有記錄;然后就是啟動ProcessCpuThread線程,mProcessCpuThread這個對象就是在剛才的構造器中初始化的;下面是發布BatteryStatsService,調用的是publish方法:
publish@BatteryStatsService.java
public void publish(Context context) {
    mContext = context;
    ServiceManager.addService(BatteryStats.SERVICE_NAME, asBinder());
    mStats.setNumSpeedSteps(new PowerProfile(mContext).getNumSpeedSteps());
    mStats.setRadioScanningTimeout(mContext.getResources().getInteger(
            com.android.internal.R.integer.config_radioScanningTimeout)
            * 1000L);
    mStats.setPowerProfile(new PowerProfile(context));
}
我們看到,這里首先就是將Battery stats服務注冊到SM中去,然后就是設置1些運行時參數,具體這些參數是甚么含義,讀者可以自己分析1下BatteryStatsService的實現,這里我們就不詳細分析了。
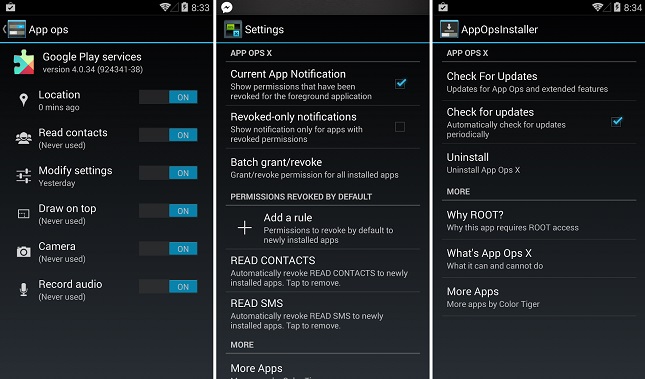
start方法的接下來的操作就是發布AppOpsService了,AppOpsService這個服務是提供android app ops服務的,甚么是android app ops服務呢?App Ops是在android 4.3中加入的1個權限管理框架,這個框架可讓你自由地賦予或撤消某個app的權限,方便管理,下圖是操作時候的界面:
關于android app ops,詳見:
http://www.androidauthority.com/app-ops-need-know⑶24850/
下面是AppOpsService的publish方法:
publish@AppOpsService.java
public void publish(Context context) {
    mContext = context;
    ServiceManager.addService(Context.APP_OPS_SERVICE, asBinder());
}
我們看到,這里就更加簡單了,直接就是向SM注冊服務。
好了,如果讀者還沒有暈掉的話,你會知道上面我們都是在分析SystemServiceManager中的startService方法。。。。。(android的代碼真是復雜,長篇大論,真是煩人!)到目前為止,我們的分析流程是這樣的:
1. tartBootstrapServices@SystemServer.java
2. startService@SystemServiceManager.java
3. Lifecycle@ActivityManagerService.java
4. onStart@Lifecycle
5. start@ActivityManagerService.java
現在我們回過頭來看下startBootstrapServices@SystemServer.java中AMS的啟動部份:
// Activity manager runs the show.
mActivityManagerService = mSystemServiceManager.startService(
        ActivityManagerService.Lifecycle.class).getService();
mActivityManagerService.setSystemServiceManager(mSystemServiceManager);
mActivityManagerService.setInstaller(installer);
我們發現我們剛剛分析完了mSystemServiceManager.startService(ActivityManagerService.Lifecycle.class)這部份的邏輯!!在這方法調用完成以后會返回Lifecycle類的對象(上面講授過,不知道你是否是記得??),然后調用這個對象的getService方法賦值給mActivityManagerService,getService方法定義以下:
getService@Lifecycle
public ActivityManagerService getService() {
    return mService;
}
而這里的mService就是在Lifecycle構造器中實例化的ActivityManagerService對象。
接下來在SystemServer.java中的操作就是調用AMS的setSystemServiceManager來將SystemServiceManager類的對象設置進去:
setSystemServiceManager@ActivityManagerService
public void setSystemServiceManager(SystemServiceManager mgr) {
   mSystemServiceManager = mgr;
}
這里就只是將對象保存下來,以后會使用到。SystemServiceManager是1個創建,啟動,和管理其他有關SystemService類系統服務的管理類,我們從這個類的代碼注釋也能看到:
/**
* Manages creating, starting, and other lifecycle events of
* {@link com.android.server.SystemService system services}.
*
* {@hide}
*/
這里說的很清楚,并且這個類的方法也是簡單明了,具體這個類在AMS中怎樣使用,我們后面分析AMS的業務邏輯的時候會提到。在startBootstrapServices@SystemServer.java的最后就是調用setInstaller方法將installer設置進去。installer是用來安裝app的,我們的AMS使用它只是想在AMS的啟動完成的時候調用installer的markBootComplete方法告知它現在AMS啟動完成了,installer可以進行工作了。這個調用是在AMS的finishBooting方法中調用的,finishBooting是ActivityStackSupervisor中初始化終了以后回調的,ActivityStackSupervisor是用來管理ActivityStack的,這個類是android 5.0中新引入的。這部份觸及到ActivityStack的管理,所以這里不過量觸及,后面我們分析ActivityStack實現時再來詳述這部份。現在大家只要知道,AMS啟動最后它的finishBooting會被ActivityStackSupervisor回調,然后這個方法中會調用installer的markBootComplete,并且還會調用SystemServiceManager的startBootPhase通知啟動的階段信息:
startBootPhase@SystemServiceManager.java
    /**
     * Starts the specified boot phase for all system services that have been started up to
     * this point.
     *
     * @param phase The boot phase to start.
     */
    public void startBootPhase(final int phase) {
        if (phase <= mCurrentPhase) {
            throw new IllegalArgumentException("Next phase must be larger than previous");
        }
        mCurrentPhase = phase;

        Slog.i(TAG, "Starting phase " + mCurrentPhase);

        final int serviceLen = mServices.size();
        for (int i = 0; i < serviceLen; i++) {
            final SystemService service = mServices.get(i);
            try {
                service.onBootPhase(mCurrentPhase);
            } catch (Exception ex) {
                throw new RuntimeException("Failed to boot service "
                        + service.getClass().getName()
                        + ": onBootPhase threw an exception during phase "
                        + mCurrentPhase, ex);
            }
        }
    }
這部份代碼比較簡單,可以看到SystemServiceManager會從mServices列表中檢出所有的service并且調用他們的onBootPhase方法通知啟動的階段信息。
到這里,AMS啟動只是完成基本的準備階段,下面還有很多的工作需要做的,大家有點耐心啊~~AMS作為android系統的重量級的服務,怎樣會就那末簡單呢??你說是吧?還是踏踏實實地看代碼吧~~~~
接下的操作還是在startBootstrapServices方法中:
startBootstrapServices@SystemServer.java
// Now that the power manager has been started, let the activity manager
// initialize power management features.
mActivityManagerService.initPowerManagement();
這里的操作比較簡單,注釋中說道,既然power manager已啟動了,那末我們的AMS就能夠初始化和battery stats相干的工作了。這里我們暫時先不詳細分析initPowerManagement的進程,后面我們分析AMS的電源部份的時候會詳細說明這1塊的內容。接著往下看startBootstrapServices的中關于AMS的代碼:
// Set up the Application instance for the system process and get started.
mActivityManagerService.setSystemProcess();
這是startBootstrapServices中關于AMS的最后1個操作了,現在大家想想,我們的AMS是1個Binder公共服務,每個app都能通過getSystemService找到它的,但是到目前為止我們并沒有看到任何關于在Binder中注冊服務的邏輯啊?現在我們看1下setSystemProcess的實現:
setSystemProcess@ActivityManagerService.java
    public void setSystemProcess() {
        try {
            ServiceManager.addService(Context.ACTIVITY_SERVICE, this, true);
            ServiceManager.addService(ProcessStats.SERVICE_NAME, mProcessStats);
            ServiceManager.addService("meminfo", new MemBinder(this));
            ServiceManager.addService("gfxinfo", new GraphicsBinder(this));
            ServiceManager.addService("dbinfo", new DbBinder(this));
            if (MONITOR_CPU_USAGE) {
                ServiceManager.addService("cpuinfo", new CpuBinder(this));
            }
            ServiceManager.addService("permission", new PermissionController(this));
            ServiceManager.addService("processinfo", new ProcessInfoService(this));

            ApplicationInfo info = mContext.getPackageManager().getApplicationInfo(
                    "android", STOCK_PM_FLAGS);
            mSystemThread.installSystemApplicationInfo(info, getClass().getClassLoader());

            synchronized (this) {
                ProcessRecord app = newProcessRecordLocked(info, info.processName, false, 0);
                app.persistent = true;
                app.pid = MY_PID;
                app.maxAdj = ProcessList.SYSTEM_ADJ;
                app.makeActive(mSystemThread.getApplicationThread(), mProcessStats);
                synchronized (mPidsSelfLocked) {
                    mPidsSelfLocked.put(app.pid, app);
                }
                updateLruProcessLocked(app, false, null);
                updateOomAdjLocked();
            }
        } catch (PackageManager.NameNotFoundException e) {
            throw new RuntimeException(
                    "Unable to find android system package", e);
        }
    }
就是這里了,我們看到這個方法上來的第1句就是ServiceManager.addService(Context.ACTIVITY_SERVICE, this, true);這句話就是我們想要找的,這句話的意思就是通過Binder向系統服務大管家ServiceManager(SM)注冊我們的服務,這樣android中的其他進程就能夠通過context的getSystemService找到我們的服務了。這個方法中的接下來的代碼讓我們感覺AMS挺游手好閑的,它還分管著meminfo,gfxinfo,dbinfo,cpuinfo,permission,processinfo等業務,還真是忙啊!這里我們先不看這些業務,由于我們知道只有Activity的管理業務才是AMS的主頁,其他的都只是副業而已了。
到這里,AMS的主體業務才算是啟動終了。這里我們簡單分析了1下android中的AMS的在開機進程中的啟動流程,目的就是給大家關于AMS啟動的1個清晰的結構,其實不是要四平八穩。個人感覺,android中的任何1個模塊拿出來的話代碼量都是巨大的,怎樣從這些代碼中找到android的設計的整體架構呢?最好的辦法還是,先整體再模塊,先抽象再具體。也就是先要知道整體的情況是甚么樣的,然后再研究細節部份,不然的話很有可能會深陷android代碼泥沼,不能自拔……

程序員人生,我編程,我富裕,記住wfuyu網,php教程,php學習,php手冊,CMS模版制作
聲明:本站大部分內容是作者原創,少部分收集于互聯網供大家一起學習,原版權很多不明,如有侵權請聯系本站,謝謝!
粵ICP備14040726號-1?? 2015-2020 程序員人生 版權所有


