Titanic (帶波紋效果的TextView)源碼分析
來(lái)源:程序員人生 發(fā)布時(shí)間:2015-08-31 07:51:49 閱讀次數(shù):3072次
前1段時(shí)間用LinearGradient(線性漸變)
寫了1個(gè)色彩變化閃動(dòng)的文字控件和文字進(jìn)度條http://blog.csdn.net/huweigoodboy/article/details/43088953,
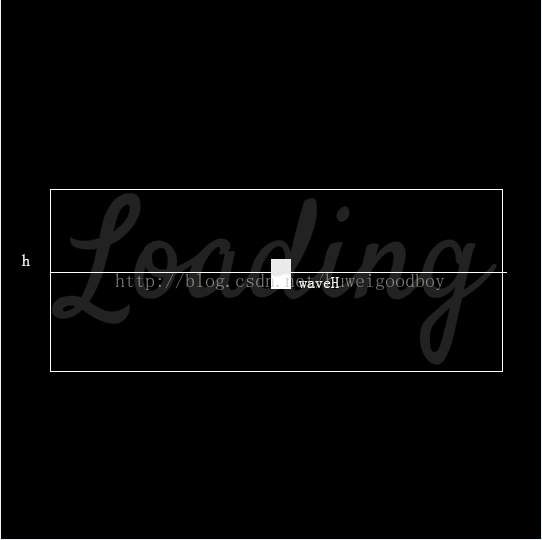
最近在github上看到1個(gè)開源控件Titanic,特拿來(lái)分析1下,效果以下圖:
1,實(shí)現(xiàn)原理
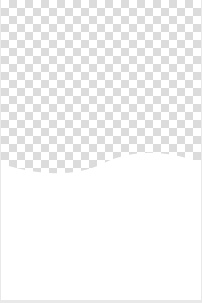
這里需要用到BitmapShader,用1張圖片為圖象渲染。
上面的圖片是1張1半透明1半呈白色的圖片,而且隨x坐標(biāo)起伏,能夠構(gòu)成波紋狀。那末僅僅靠上面1張圖片如何得到效果圖中的效果呢?
設(shè)置著色器在x,y方向上分別為:REPEAT,CLAMP。x方向上會(huì)重復(fù),y方向上會(huì)用邊沿色彩填充。
1,創(chuàng)建shader
private void createShader() {
if (wave == null) {
wave = getResources().getDrawable(R.drawable.wave);
}
int waveW = wave.getIntrinsicWidth();
int waveH = wave.getIntrinsicHeight();
Bitmap b = Bitmap.createBitmap(waveW, waveH, Bitmap.Config.ARGB_8888);
Canvas c = new Canvas(b);
c.drawColor(getCurrentTextColor());
wave.setBounds(0, 0, waveW, waveH);
wave.draw(c);
shader = new BitmapShader(b, Shader.TileMode.REPEAT, Shader.TileMode.CLAMP); //設(shè)置著色器的TileMode
getPaint().setShader(shader);
offsetY = (getHeight() - waveH) / 2; //計(jì)算偏移Y 默許放在textView的中間
}
offsetY為圖中中間白線的位置。
2,繪圖
@Override
protected void onDraw(Canvas canvas) {
// modify text paint shader according to sinking state
if (sinking && shader != null) {
// first call after sinking, assign it to our paint
if (getPaint().getShader() == null) {
getPaint().setShader(shader);
}
// translate shader accordingly to maskX maskY positions
// maskY is affected by the offset to vertically center the wave
shaderMatrix.setTranslate(maskX, maskY + offsetY); //平移變換,設(shè)置著色圖片的坐標(biāo) ,maskX,maskY為shader的坐標(biāo)變換值
// assign matrix to invalidate the shader
shader.setLocalMatrix(shaderMatrix);
} else {
getPaint().setShader(null);
}
super.onDraw(canvas);
}
3,屬性動(dòng)畫
// horizontal animation. 200 = wave.png width
//x方向上的變化,變換范圍是從0-waveW
ObjectAnimator maskXAnimator = ObjectAnimator.ofFloat(textView, "maskX", 0, 200);
maskXAnimator.setRepeatCount(ValueAnimator.INFINITE); //變換次數(shù)設(shè)為不限制
maskXAnimator.setDuration(1000);
maskXAnimator.setStartDelay(0);
int h = textView.getHeight();
// vertical animation
// maskY = 0 -> wave vertically centered
// repeat mode REVERSE to go back and forth
//y方向是h/2 -> -h/2,折合偏移量,就是從textView底部到頂部。
ObjectAnimator maskYAnimator = ObjectAnimator.ofFloat(textView, "maskY", h/2, - h/2);
maskYAnimator.setRepeatCount(ValueAnimator.INFINITE);
maskYAnimator.setRepeatMode(ValueAnimator.REVERSE);
maskYAnimator.setDuration(10000);
maskYAnimator.setStartDelay(0);
maskX,maskY為shader偏移坐標(biāo)。maskX從0到waveW變換,構(gòu)成波紋效果。
在y方向上,從h(textView的高度)/2到-h/2變換,由于TileMode是CLAMP,就構(gòu)成了上面是透明,下面是白色的效果。
2,拓展
這里實(shí)現(xiàn)了1個(gè)y方向上的移動(dòng)波紋效果,那怎樣做1個(gè)x方向上的?
思路以下:
wave。png順時(shí)針旋轉(zhuǎn)90度。然后x,y方向上的變化反過(guò)來(lái)就好了。這里我就不去實(shí)現(xiàn)了。
添加少許注釋的完全代碼
下載地址
生活不易,碼農(nóng)辛苦
如果您覺(jué)得本網(wǎng)站對(duì)您的學(xué)習(xí)有所幫助,可以手機(jī)掃描二維碼進(jìn)行捐贈(zèng)