使用HttpURLConnection發送get和post請求
來源:程序員人生 發布時間:2015-08-05 08:30:11 閱讀次數:3255次
轉載請注明出處:http://blog.csdn.net/forwardyzk/article/details/45364463
我們在開發的使用,直接使用的開源框架,例如:Xutil,Volley開源框架直接訪問網絡,但是我們也需要知道其中的1些知識,了解1下怎樣訪問網絡的。下面我們摹擬以下客戶端和服務端,看看post和get要求。
首先我們開發1下客戶端:
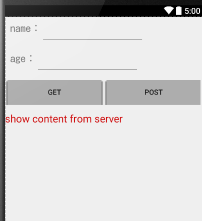
1.首先自定義線程,開啟get要求。
public class GetThread extends Thread {
private String name;
private String age;
private TextView show_content;
private String url = "";
private Handler handler = new Handler();
public GetThread(String url, TextView show_content) {
this.show_content = show_content;
this.url = url;
}
public GetThread(String url, String name, String age, TextView show_content) {
this.name = name;
this.age = age;
this.show_content = show_content;
this.url = url;
}
@Override
public void run() {
super.run();
getRun();
}
private void getRun() {
if (TextUtils.isEmpty(url)) {
throw new NullPointerException("please ensure url is not equals null ");
}
BufferedReader bufferedReader = null;
try {
if (!TextUtils.isEmpty(name) && !TextUtils.isEmpty(age)) {
url = url + "?name=" + URLEncoder.encode(name, "utf⑻") + "&age=" + URLEncoder.encode(age, "utf⑻");
}
URL httpUrl = new URL(url);
HttpURLConnection httpURLConnection = (HttpURLConnection) httpUrl.openConnection();
httpURLConnection.setReadTimeout(5000);
httpURLConnection.setRequestMethod("GET");
//設置要求頭header
httpURLConnection.setRequestProperty("test-header","get-header-value");
//獲得內容
InputStream inputStream = httpURLConnection.getInputStream();
bufferedReader = new BufferedReader(new InputStreamReader(inputStream));
final StringBuffer stringBuffer = new StringBuffer();
String line = null;
while ((line = bufferedReader.readLine()) != null) {
stringBuffer.append(line);
}
handler.post(new Runnable() {
@Override
public void run() {
show_content.setText(stringBuffer.toString());
}
});
} catch (Exception e) {
} finally {
if (bufferedReader != null) {
try {
bufferedReader.close();
} catch (IOException e) {
e.printStackTrace();
}
}
}
}
}
對Get要求,要求參數是拼接在Url上的。例如:http://xxxx?name=zhangsan&age=20
httpURLConnection.setReadTimeout(5000);設置超時時間
httpURLConnection.setRequestMethod("GET");設置要求方法
httpURLConnection.setRequestProperty("test-header","get-header-value");設置要求頭header
獲得從服務器傳回來的內容
InputStream inputStream = httpURLConnection.getInputStream();
講InputStream 轉換成BufferedReader,便于操作流
將流中的數據存入到了StringBuffer中,最后設置給展現內容的TextView上。
最后要記得關閉流。
2.自定義PostThread線程,開啟Post要求
public class PostThread extends Thread {
private String name;
private String age;
private TextView show_content;
private String url = "";
private Handler handler = new Handler();
public PostThread(String url, TextView show_content) {
this.show_content = show_content;
this.url = url;
}
public PostThread(String url, String name, String age, TextView show_content) {
this.name = name;
this.age = age;
this.show_content = show_content;
this.url = url;
}
@Override
public void run() {
super.run();
getRun();
}
private void getRun() {
// Properties p=System.getProperties();
// p.list(System.out);
if (TextUtils.isEmpty(url)) {
throw new NullPointerException("please ensure url is not equals null ");
}
BufferedReader bufferedReader = null;
try {
URL httpUrl = new URL(url);
HttpURLConnection httpURLConnection = (HttpURLConnection) httpUrl.openConnection();
//設置要求頭header
httpURLConnection.setRequestProperty("test-header","post-header-value");
httpURLConnection.setRequestMethod("POST");
httpURLConnection.setReadTimeout(5000);
//設置要求參數
if (!TextUtils.isEmpty(name) && !TextUtils.isEmpty(age)) {
OutputStream outputStream = httpURLConnection.getOutputStream();
// String params="name="+ URLEncoder.encode(name, "utf⑻")+"&age="+ URLEncoder.encode(age, "utf⑻");
String params="name="+ name+"&age="+ age;
outputStream.write(params.getBytes());
}
//獲得內容
InputStream inputStream = httpURLConnection.getInputStream();
bufferedReader = new BufferedReader(new InputStreamReader(inputStream));
final StringBuffer stringBuffer = new StringBuffer();
String line = null;
while ((line = bufferedReader.readLine()) != null) {
stringBuffer.append(line);
}
handler.post(new Runnable() {
@Override
public void run() {
show_content.setText(stringBuffer.toString());
}
});
} catch (Exception e) {
} finally {
if (bufferedReader != null) {
try {
bufferedReader.close();
} catch (IOException e) {
e.printStackTrace();
}
}
}
}
}
對Post要求和Get要求有不同的地方
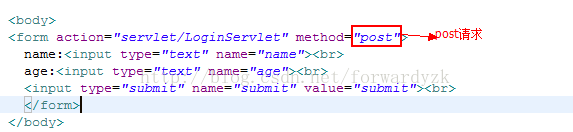
get要求是把要求參數拼接到Url中,可以在url中看到。而post要求不把要求參數放在了要求體中。
給Post設置要求參數
OutputStream outputStream = httpURLConnection.getOutputStream();獲得要求連接的寫入流
String params="name="+ name+"&age="+ age;拼接要求參數字符串
outputStream.write(params.getBytes());講要求參數寫入到寫入流中
其他的地方和get要求是1樣的。
3.在MainActivity中開啟線程,并發送get和Post要求
/**
* get request
*/
private void getSubmit() {
String url = AddressUtil.LOGIN_URL;
String name = ed_name.getText().toString().trim();
String age = ed_age.getText().toString().trim();
new GetThread(url,name,age ,show_content).start();
}
/**
* post request
*/
private void postSubmot() {
String url = AddressUtil.LOGIN_URL;
String name = ed_name.getText().toString().trim();
String age = ed_age.getText().toString().trim();
new PostThread(url,name,age ,show_content).start();
}
開啟GetThread線程,發送get要求
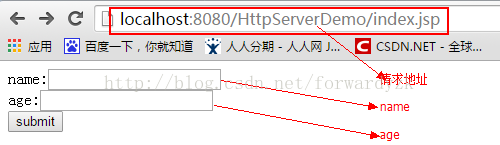
第1個參數:要求地址
第2個參數:登錄的名字,寫入到了要求參數中
第3個參數:登錄的年齡,寫入到了要求參數中
第4個參數:展現服務器返回內容的展現的TextView
public class AddressUtil {
public final static String LOCALHOST="http://10.2.52.19:8080";
public final static String LOGIN_URL=LOCALHOST+"/HttpServerDemo/servlet/LoginServlet";
}
地址摹擬服務器的地址。下面我們就看1看服務器是怎樣運作的。
3.開發摹擬的服務器
新建LoginServlet
public void doGet(HttpServletRequest request, HttpServletResponse response)
throws ServletException, IOException {
doPost(request, response);
}
/**
* The doPost method of the servlet. <br>
*
* This method is called when a form has its tag value method equals to
* post.
*
* @param request
* the request send by the client to the server
* @param response
* the response send by the server to the client
* @throws ServletException
* if an error occurred
* @throws IOException
* if an error occurred
*/
public void doPost(HttpServletRequest request, HttpServletResponse response)
throws ServletException, IOException {
response.setContentType("text/html;charset=utf⑻");
request.setCharacterEncoding("utf⑻");
// 獲得要求頭
String header = request.getHeader("test-header");
if (header != null && !header.equals(""))
System.out.println("test-header=" + header);
// 獲得要求參數
String name = request.getParameter("name");
String age = request.getParameter("age");
// 打印流
PrintWriter out = response.getWriter();
// 拼接返回給服務真個內容,并且輸出
if (name == null || name.equals("") || age == null || age.equals("")) {
out.println("{'result':'1','error':'name and age is null'");
} else {
out.println("{'result':'0','user':{'name':'"
+ new String(name.getBytes("iso⑻859⑴"), "utf⑻")
+ "','age':'"
+ new String(age.getBytes("iso⑻859⑴"), "utf⑻") + "'}}");
System.out.println("name="
+ new String(name.getBytes("iso⑻859⑴"), "utf⑻"));
System.out.println("age="
+ new String(age.getBytes("iso⑻859⑴"), "utf⑻"));
}
out.flush();
out.close();
}
在index.jsp中寫登錄的界面
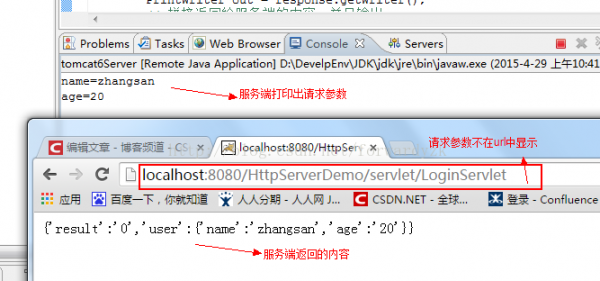
3.1代碼:Post要求
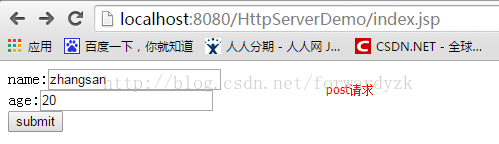
顯示下面的截圖,表示post要求成功
3.2 Get要求
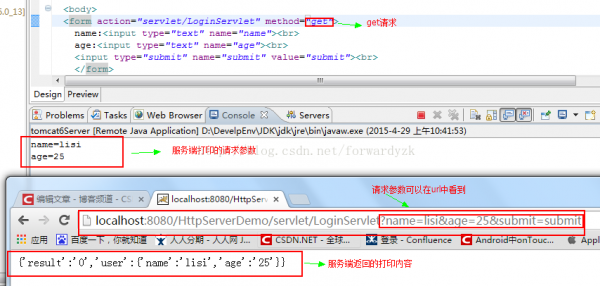
如果限制的內容和圖片是1樣,標識get要求已成功訪問。
4.下面使用手機真個App訪問服務端
使用手機端訪問服務端,要把localhost轉換成IP地址
要求地址的拼接
public class AddressUtil {
public final static String LOCALHOST="http://10.2.52.19:8080";
public final static String LOGIN_URL=LOCALHOST+"/HttpServerDemo/servlet/LoginServlet";
}
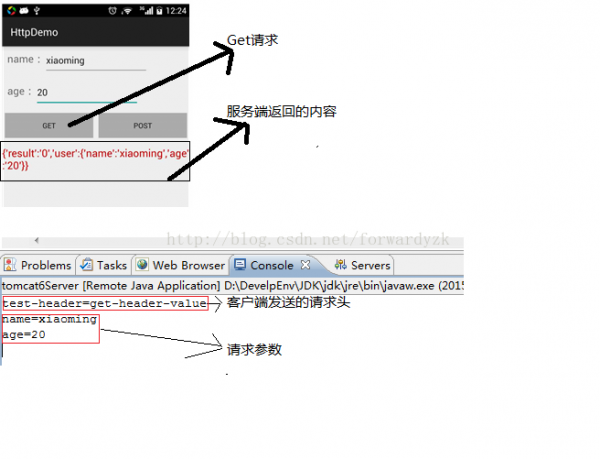
4.1Get要求
代碼要求
/**
* get request
*/
private void getSubmit() {
String url = AddressUtil.LOGIN_URL;
String name = ed_name.getText().toString().trim();
String age = ed_age.getText().toString().trim();
new GetThread(url,name,age ,show_content).start();
}
要求結果
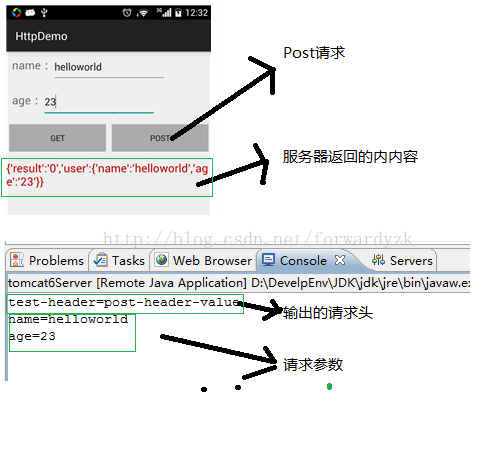
4.2 Post要求
代碼要求
/**
* post request
*/
private void postSubmot() {
String url = AddressUtil.LOGIN_URL;
String name = ed_name.getText().toString().trim();
String age = ed_age.getText().toString().trim();
new PostThread(url,name,age ,show_content).start();
}
要求結果:
這樣客服端和服務真個開發,get和post要求已成功。
客戶端源碼下載:http://download.csdn.net/detail/forwardyzk/8645171
服務端源碼下載:http://download.csdn.net/detail/forwardyzk/8645181
生活不易,碼農辛苦
如果您覺得本網站對您的學習有所幫助,可以手機掃描二維碼進行捐贈


