
本節教程將講授擴大包開發和Artisan擴大開發,并閱讀不同分辨率下的自適應效果。本節結束后全部教程就結束了,文章最后有完全版程序代碼的下載。
在前面開發中,我們常常要用到通知,如修改用戶信息時視圖要寫
@if (Session::has('message'))
  <div class="am-alert am-alert-{{ Session::get('message')['type'] }}" data-am-alert>
    <p>{{ Session::get('message')['content'] }}</p>
  </div>
@endif
在業務邏輯代碼中需要使用
return Redirect::route('user.edit', $id)->with('user', $user)->with('message', array('type' => 'success', 'content' => 'Modify successfully'));現在我們這里實現1個簡單的通知插件,先創建包:
$ php artisan workbench shiyanlou/notification --resources這時候會在項目根目錄下多1個名為workbench的目錄,里面寄存的就是剛才創建的包,我們進入shiyanlou/notification目錄,src/Shiyanlou/Notification目錄是所有class的主目錄,包括ServiceProvider。config、lang、migrations和views目錄,就如你所猜想,包括了你創建的包的相應資源。包可以包括這些資源中的任意幾個,就像1個”常規”的利用。
修改下包里composer.json中的authors:
"authors": [
    {
        "name": "shiyanlou",
        "email": "support@shiyanlou.com"
    }
]
在項目根目錄下履行:
$ php artisan dump-autoload然后我們在app/config/app.php中的providers中增加:
'ShiyanlouNotificationNotificationServiceProvider',這步做完后啟動開發服務器:
$ php artisan serve如果啟動成功,就說明擴大包的基礎就搭建完成了。
現在我們在src/Shiyanlou/Notification下創建1個名為Notification.php的文件,修改:
<?php namespace ShiyanlouNotification;

use IlluminateSessionStore as SessionStore;

class Notification {
    private $session = null;

    public function __construct(SessionStore $session)
    {
        $this->session = $session;
    }

    private function addMessage($type, $content)
    {
        $this->session->put('notification_message', '<div class="am-alert ' . $type . '" data-am-alert><p></p>' . $content . '</div>');
    }

    public function primary($content)
    {
        $this->addMessage('am-alert-primary', $content);
    }

    public function secondary($content)
    {
        $this->addMessage('am-alert-secondary', $content);
    }

    public function success($content)
    {
        $this->addMessage('am-alert-success', $content);
    }

    public function warning($content)
    {
        $this->addMessage('am-alert-warning', $content);
    }

    public function danger($content)
    {
        $this->addMessage('am-alert-danger', $content);
    }

    public function show()
    {
        echo $this->session->pull('notification_message', '');
    }
}
上面用到了Session,Session表示1次會話,就是從你打開閱讀器窗口到關閉。
修改NotificationServiceProvider.php中的register()和provides():
public function register()
{
    $this->app['notification'] = $this->app->share(function($app)
    {
        return new Notification($this->app['session.store']);
    });
}

public function provides()
{
    return array('notification');
}
上面是向Ioc容器注冊類。
然后在src/Shiyanlou/Notification下創建1個名為Facades的文件夾,在Facades目錄下創建1個名為Notification.php的文件,修改:
<?php namespace ShiyanlouNotificationFacades;

use IlluminateSupportFacadesFacade;

class Notification extends Facade {
    protected static function getFacadeAccessor()
    {
        return 'notification';
    }
}我們這里繼承了Facade類,用Facades可以訪問IoC容器中注冊的類,有了IoC容器,我們可以在任何地方調用注冊的類。
為了方便我們的使用,我們在app/config/app.php的aliases中增加1個別名:
'Notification' => 'ShiyanlouNotificationFacadesNotification',下面就來試試這個插件,把上面的
@if (Session::has('message'))
  <div class="am-alert am-alert-{{ Session::get('message')['type'] }}" data-am-alert>
    <p>{{ Session::get('message')['content'] }}</p>
  </div>
@endif
替換成
{{ Notification::show() }}把
return Redirect::route('user.edit', $id)->with('user', $user)->with('message', array('type' => 'success', 'content' => 'Modify successfully'));替換成
Notification::success('Modify successfully');
return Redirect::route('user.edit', $id);
現在修改用戶信息后提示成功的信息就可以方便地顯示出來:
簡單的擴大包開發就完成了。
Artisan是Laravel中自帶的命令行工具的名稱,它提供了1些開發進程中有用的命令。我們可以編寫自己的Artisan命令完成特定的功能,這里舉1個開發導出用戶數據的命令。首先我們創建1個新的命令類:
$ php artisan command:make ExportUsersCommand履行完后我們會發現在app/commands生成了1個ExportUsersCommand.php的文件,這個就是我們自定義的命令類,然后我們需要注冊命令,在app/start/artisan.php中增加:
Artisan::add(new ExportUsersCommand);下面編寫ExportUsersCommand類,把$name的值改成export:users,這個$name是命令的名稱,把$description的值改成Export all users,這個是命令的描寫,然后添加1個獲得用戶數據的方法:
protected function getUsersData()
{
    $users = User::all();
    foreach ($users as $user) {
        $output[] = [$user->id, $user->email, $user->nickname,
                     $user->is_admin, $user->block, $user->created_at];
    }
    return $output;
}然后編寫getArguments()和getOptions():
protected function getArguments()
{
    return array(
        array('file', InputArgument::OPTIONAL, 'The output file path', null),
    );
}

protected function getOptions()
{
    return array(
        array('headers', null, InputOption::VALUE_NONE, 'Display headers?', null),
    );
}getArguments與getOptions方法是用來接收要傳入您的自定義命令的地方,這兩個方法都會回傳1組命令數組,并由數組清單所組成。
下面開始編寫fire():
public function fire()
{
    $output_path = $this->argument('file');
    $headers = ['ID', 'E-mail', 'NickName', 'is_admin', 'is_block', 'CreateDateTime'];
    $rows = $this->getUsersData();
    if ($output_path) {
        $handle = fopen($output_path, 'w');
        if ($this->option('headers')) {
            fputcsv($handle, $headers);
        }
        foreach ($rows as $row) {
            fputcsv($handle, $row);
        }
        fclose($handle);
        $this->info("Exported list to $output_path");
    } else {
        $table = $this->getHelperSet()->get('table');
        $table->setHeaders($headers)->setRows($rows);
        $table->render($this->getOutput());
    }
}當自定義命令被履行時,將會調用fire方法,你可以在此加入任何的邏輯判斷。
現在就能夠測試我們自己開發的命令了,先履行:
$ php artisan export:users履行后會在命令行終端輸出用戶列表,我們試試導出到1個文件:
$ php artisan export:users --headers users.csv履行后終端會輸出Exported list to users.csv,在項目根目錄下會生成1個名為users.csv的文件,你可以用表格軟件或直接打開,里面寄存的就是用戶的數據列表。
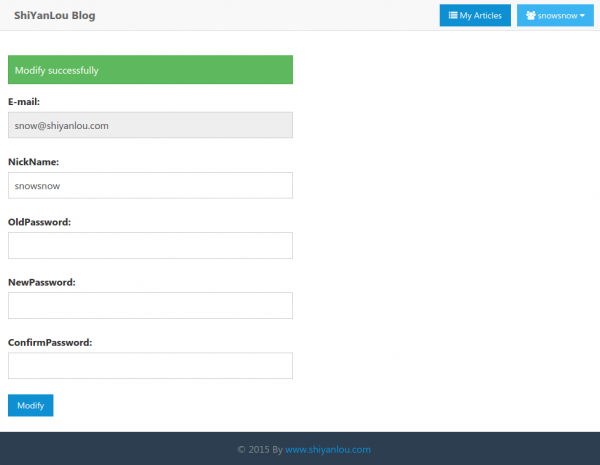
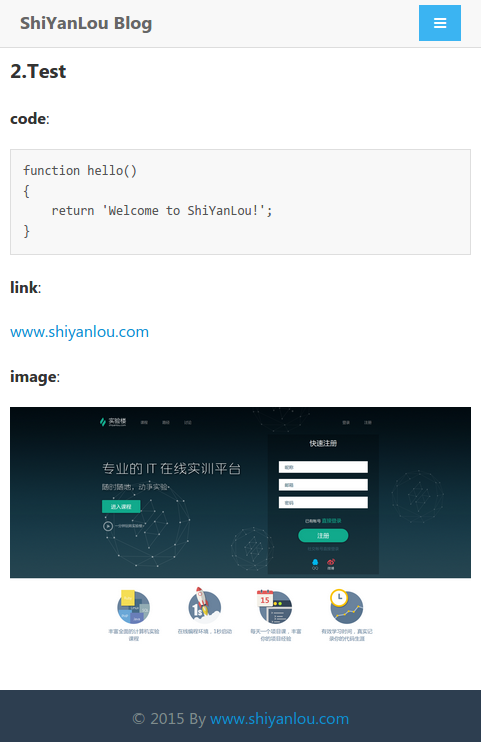
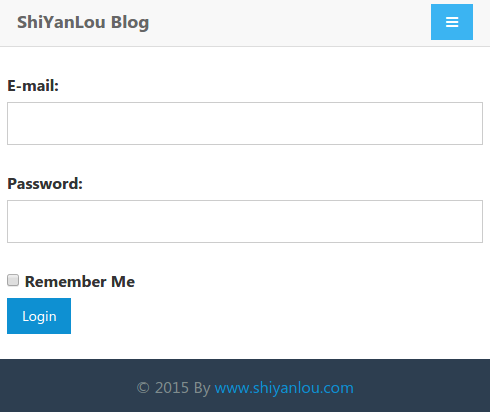
讓我們看下在低分辨率下的自適應效果
首頁
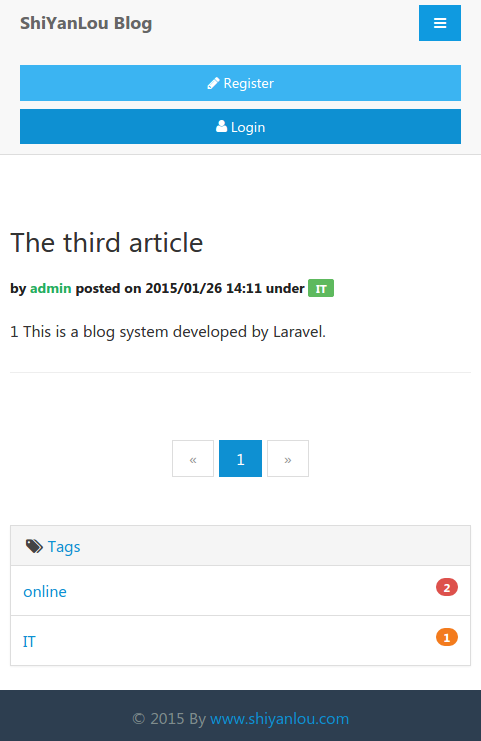
文章內容頁面
登錄頁面
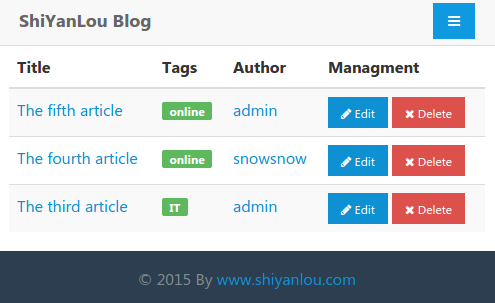
文章管理頁面
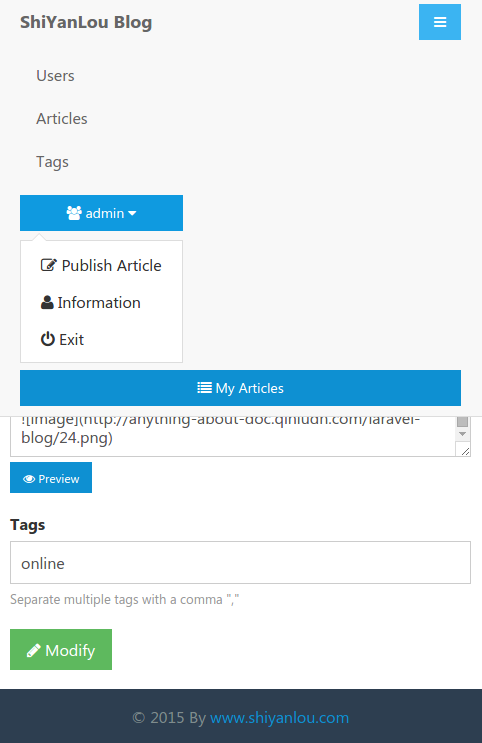
編輯文章頁面
本節教程介紹了怎樣進行擴大包和Artisan開發,本套教程也就此結束了,你可以繼續完善這個博客,此教程僅僅只是做1個引入人,你完全可以用Laravel開發自己想要的網站,Laravel中的緩沖、Mail、本地化和隊列等還沒有提到,這就需要你自己去探索了,最后推薦1個開發環境Laravel Homestead,我們可以非常方便地在其中開發Laravel。
終究版代碼下載:
$ git clone https://github.com/shiyanlou/laravel-blog⑺-final.git本文詳細出自http://www.shiyanlou.com/courses/123,轉載請注明出處

上一篇 linux常用命令整理
程序員人生,我編程,我富裕,記住wfuyu網,php教程,php學習,php手冊,CMS模版制作
聲明:本站大部分內容是作者原創,少部分收集于互聯網供大家一起學習,原版權很多不明,如有侵權請聯系本站,謝謝!
粵ICP備14040726號-1?? 2015-2020 程序員人生 版權所有


