Android網絡編程之傳遞數據給服務器(二)
來源:程序員人生 發布時間:2014-09-29 13:32:08 閱讀次數:2645次
Android網絡編程之傳遞數據給服務器(二)
請尊重他人的勞動成果,轉載請注明出處:Android網絡編程之傳遞數據給服務器(二)
我曾在《Android網絡編程之傳遞數據給服務器(一) 》 一文中介紹了如何通過GET方式傳遞數據給服務器,通過GET方式傳遞數據主要適用于數據大小不超過2KB,且對安全性要求不高的情況下。下面就介紹通過POST方式傳遞數據主到服務器。
一、通過Post方式傳遞數據給服務器
通過Post方式傳遞數據給服務器是Android應用程序開發提交數據給服務器的一種主要的方式,適用于數據量大、數據類型復雜、數據安全性高的場合。
1.創建服務器端:
服務器端項目結構:
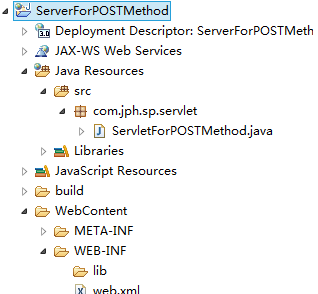
第一步:創建控制器Servlet
package com.jph.sp.servlet;
import java.io.IOException;
import javax.servlet.ServletException;
import javax.servlet.annotation.WebServlet;
import javax.servlet.http.HttpServlet;
import javax.servlet.http.HttpServletRequest;
import javax.servlet.http.HttpServletResponse;
@WebServlet("/ServletForPOSTMethod")
public class ServletForPOSTMethod extends HttpServlet {
private static final long serialVersionUID = 1L;
protected void doGet(HttpServletRequest request, HttpServletResponse response) throws ServletException, IOException {
// TODO Auto-generated method stub
}
protected void doPost(HttpServletRequest request, HttpServletResponse response) throws ServletException, IOException {
String name= request.getParameter("name");
String pwd= request.getParameter("pwd");
System.out.println("name from POST method: " + name );
System.out.println("pwd from POST method: " + pwd );
}
}
至此服務器端項目已經完成。下面開始創建Android端項目。
2.創建Android端:
Android端項目結構:
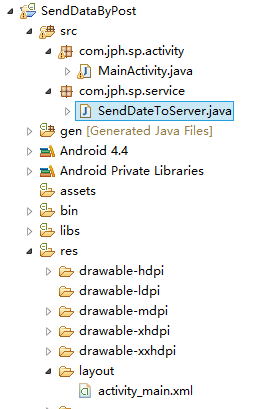
第一步:創建Android端項目的業務邏輯層
核心代碼:SendDateToServer.java:
package com.jph.sp.service;
import java.io.OutputStream;
import java.net.HttpURLConnection;
import java.net.URL;
import java.net.URLEncoder;
import java.util.HashMap;
import java.util.Map;
import android.os.Handler;
/**
* 通過POST方式向服務器發送數據
* @author jph
* Date:2014.09.27
*/
public class SendDateToServer {
private static String url="http://10.219.61.117:8080/ServerForPOSTMethod/ServletForPOSTMethod";
public static final int SEND_SUCCESS=0x123;
public static final int SEND_FAIL=0x124;
private Handler handler;
public SendDateToServer(Handler handler) {
// TODO Auto-generated constructor stub
this.handler=handler;
}
/**
* 通過POST方式向服務器發送數據
* @param name 用戶名
* @param pwd 密碼
*/
public void SendDataToServer(String name,String pwd) {
// TODO Auto-generated method stub
final Map<String, String>map=new HashMap<String, String>();
map.put("name", name);
map.put("pwd", pwd);
new Thread(new Runnable() {
@Override
public void run() {
// TODO Auto-generated method stub
try {
if (sendPostRequest(map,url,"utf-8")) {
handler.sendEmptyMessage(SEND_SUCCESS);//通知主線程數據發送成功
}else {
//將數據發送給服務器失敗
}
} catch (Exception e) {
// TODO Auto-generated catch block
e.printStackTrace();
}
}
}).start();
}
/**
* 發送POST請求
* @param map 請求參數
* @param url 請求路徑
* @return
* @throws Exception
*/
private boolean sendPostRequest(Map<String, String> param, String url,String encoding) throws Exception {
// TODO Auto-generated method stub
//http://10.219.61.117:8080/ServerForPOSTMethod/ServletForPOSTMethod?name=aa&pwd=124
StringBuffer sb=new StringBuffer(url);
if (!url.equals("")&!param.isEmpty()) {
sb.append("?");
for (Map.Entry<String, String>entry:param.entrySet()) {
sb.append(entry.getKey()+"=");
sb.append(URLEncoder.encode(entry.getValue(), encoding));
sb.append("&");
}
sb.deleteCharAt(sb.length()-1);//刪除字符串最后 一個字符“&”
}
byte[]data=sb.toString().getBytes();
HttpURLConnection conn=(HttpURLConnection) new URL(url).openConnection();
conn.setConnectTimeout(5000);
conn.setRequestMethod("POST");//設置請求方式為POST
conn.setDoOutput(true);//允許對外傳輸數據
conn.setRequestProperty("Content-Type", "application/x-www-form-urlencoded");// 設置窗體數據編碼為名稱/值對
conn.setRequestProperty("Content-Length", data.length+"");
OutputStream outputStream=conn.getOutputStream();//打開服務器的輸入流
outputStream.write(data);//將數據寫入到服務器的輸出流
outputStream.flush();
if (conn.getResponseCode()==200) {
return true;
}
return false;
}
}
第三步:創建Activity
package com.jph.sp.activity;
import com.jph.sp.service.SendDateToServer;
import android.os.Bundle;
import android.os.Handler;
import android.os.Message;
import android.app.Activity;
import android.view.View;
import android.view.View.OnClickListener;
import android.widget.Button;
import android.widget.EditText;
import android.widget.Toast;
/**
* 通過Post方式傳遞數據給服務器是Android應用程序開發
* 提交數據給服務器的一種主要的方式,適用于數據量大、
* 數據類型復雜、數據安全性高的場合。
* @author jph
* Date:2014.09.27
*/
public class MainActivity extends Activity {
private EditText edtName,edtPwd;
private Button btnSend;
Handler handler=new Handler(){
public void handleMessage(Message msg) {
switch (msg.what) {
case SendDateToServer.SEND_SUCCESS:
Toast.makeText(MainActivity.this, "登陸成功", Toast.LENGTH_SHORT).show();
break;
case SendDateToServer.SEND_FAIL:
Toast.makeText(MainActivity.this, "登陸失敗", Toast.LENGTH_SHORT).show();
break;
default:
break;
}
};
};
@Override
protected void onCreate(Bundle savedInstanceState) {
super.onCreate(savedInstanceState);
setContentView(R.layout.activity_main);
edtName=(EditText)findViewById(R.id.edtName);
edtPwd=(EditText)findViewById(R.id.edtPwd);
btnSend=(Button)findViewById(R.id.btnSend);
btnSend.setOnClickListener(new OnClickListener() {
@Override
public void onClick(View v) {
// TODO Auto-generated method stub
String name=edtName.getText().toString();
String pwd=edtPwd.getText().toString();
if (edtName.equals("")||edtPwd.equals("")) {
Toast.makeText(MainActivity.this, "用戶名或密碼不能為空", Toast.LENGTH_LONG).show();
}else {
new SendDateToServer(handler).SendDataToServer(name, pwd);
}
}
});
}
}
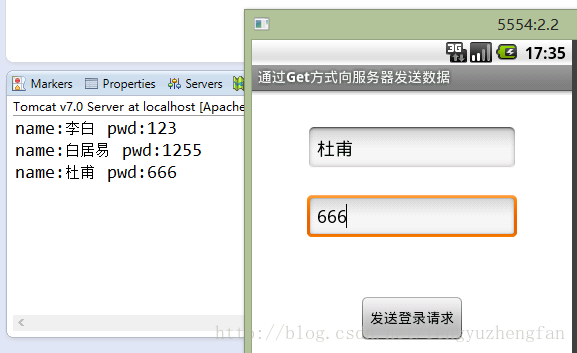
至此Android端項目已經完成了。下面就讓我們看一下APP運行效果吧:
Android運行效果圖:
生活不易,碼農辛苦
如果您覺得本網站對您的學習有所幫助,可以手機掃描二維碼進行捐贈


