本系列文章由@淺墨_毛星云 出品,轉載請注明出處。
文章鏈接: http://blog.csdn.net/poem_qianmo/article/details/51764028
作者:毛星云(淺墨) 微博:http://weibo.com/u/1723155442
本文工程使用的Unity3D版本: 5.2.1
這篇文章主要講授了如何在Unity3D中分別使用Surface Shader和Vertex & Fragment Shader來編寫邊沿發光Shader。
1、終究實現的效果
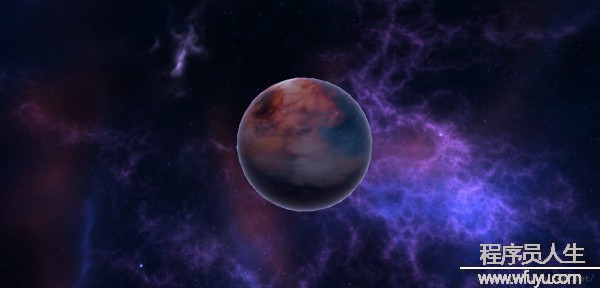
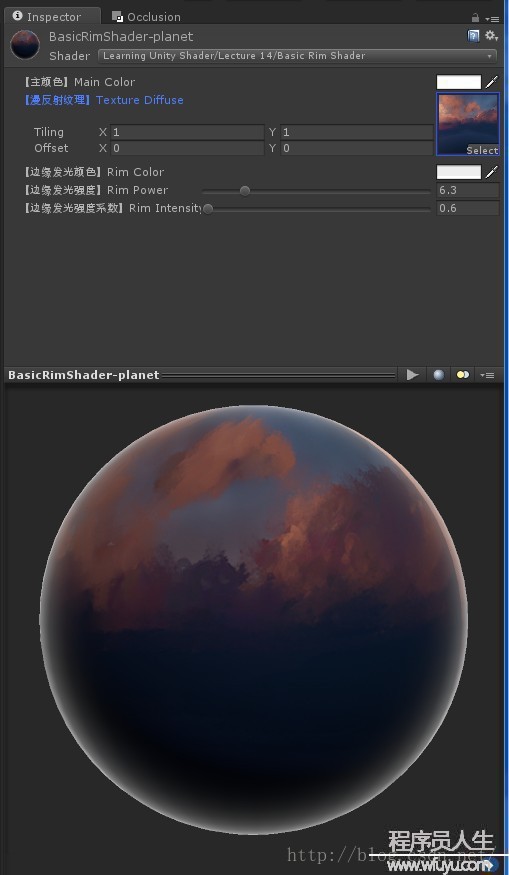
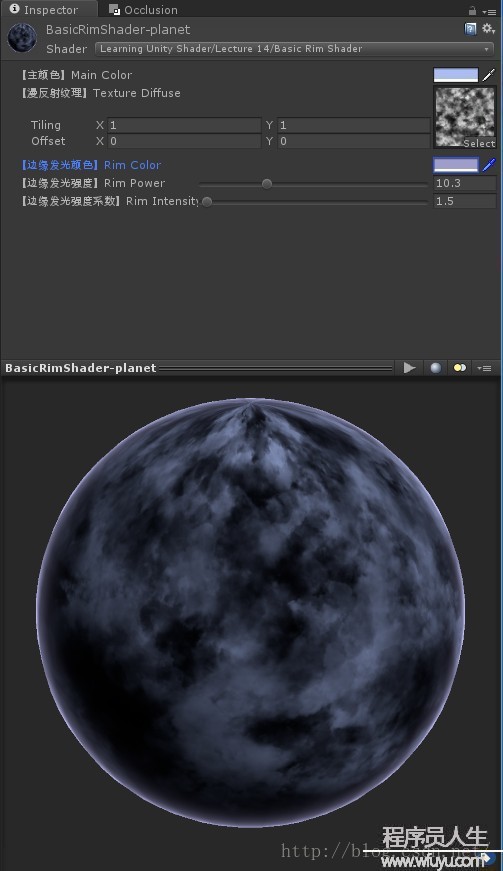
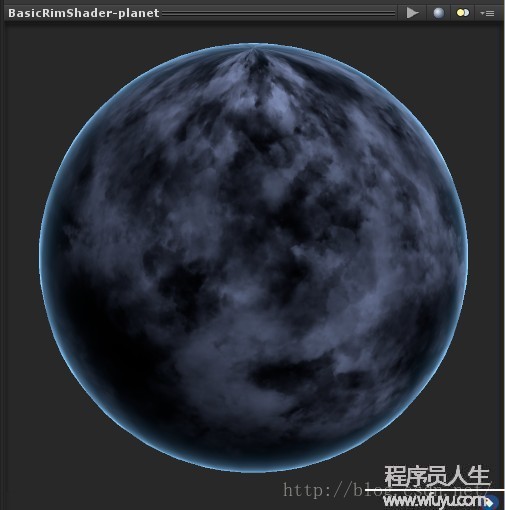
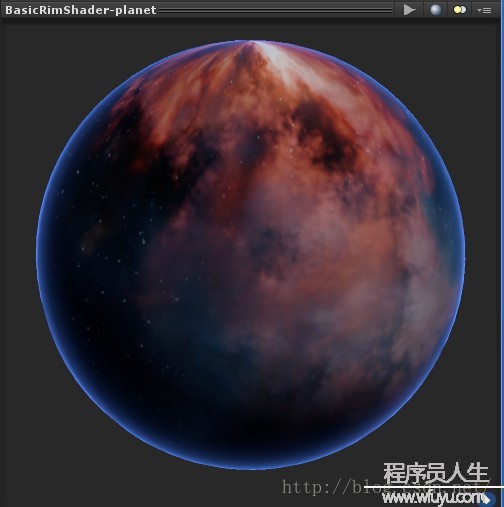
邊沿發光Shader比較直觀的1個應用便是摹擬宇宙中的星球效果。將本文實現的邊沿發光Shader先賦1個Material,此Material再賦給1個球體,加上Galaxy Skybox, 實現的效果以下圖:
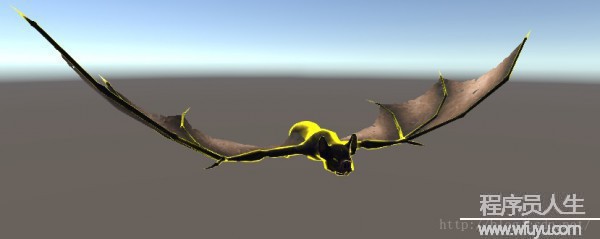
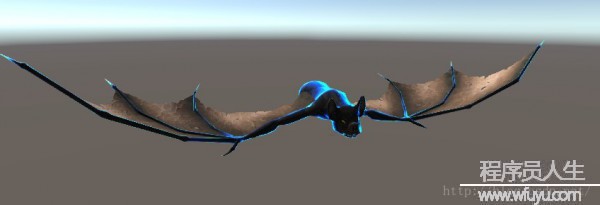
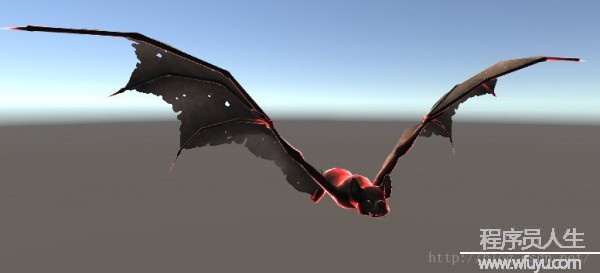
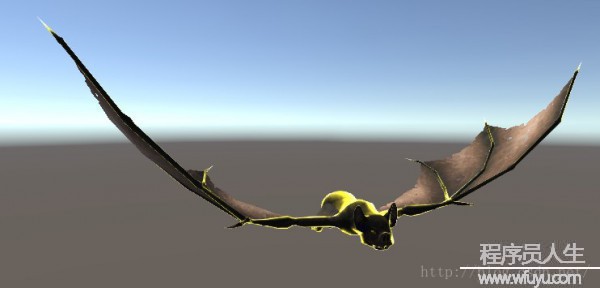
固然,邊沿發光Shader也能夠實現例如暗黑3中精英怪的高亮效果,將1個怪物模型本身的Shader用邊沿發光Shader替換,實現效果以下圖:
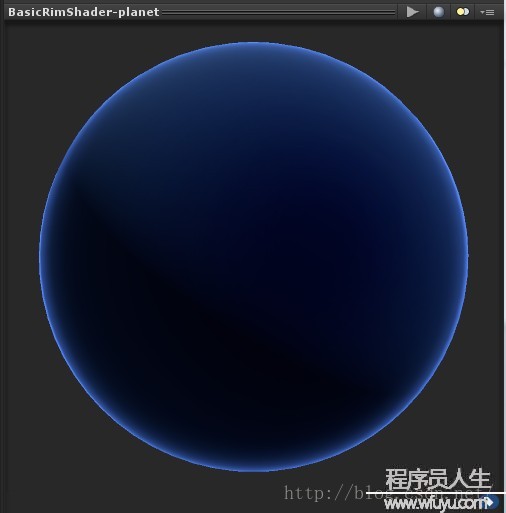
以下是本文實現的Shader在編輯器中的1些效果圖。
2、Shader實現思路分析
思路方面,其實理解起來非常簡單,就是在正常的漫反射Shader的基礎之上,在終究的漫反射色彩值出來以后,再準備1個自發光色彩值,附加上去,即得到了終究的帶自發光的色彩值。
按公式來表達,也就是這樣:
終究色彩 = (漫反射系數 x 紋理色彩 x RGB色彩)+自發光色彩
按英文公式來表達,也就是這樣:
FinalColor=(Diffuse x Texture x RGBColor)+Emissive
3、Surface Shader版邊沿發光Shader實現
如果讀過這個系列第1篇文章的朋友,應當還記得這個系列的第1篇文章(傳送門:http://blog.csdn.net/poem_qianmo/article/details/40723789),里面的TheFirstShader,它就是1個標準的使用Unity Surface Shader實現的邊沿發光Shader。
利用Unity本身的Shader封裝,Surface Shader,也就是Shaderlab,算是新手或想快速上手的童鞋學習Unity中Shader書寫的1個非常好的切入點。
這邊貼出經過加強的第1期TheFirstShader詳細注釋后的源代碼。可以發現里面關于主要框架的注釋都是中英雙語的,由于發現很多國外友人也關注了我在Github上的Shader repo(https://github.com/QianMo/Awesome-Unity-Shader),為了方便他們和后面更多的國外友人,以后如果周末寫博客的時間充裕,就干脆寫中英雙語的注釋得了。
OK,詳細注釋后的Surface Shader版可發光Shader源代碼以下:
Shader "Learning Unity Shader/Lecture 14/Surface Rim Shader" { //-----------------------------------【屬性 || Properties】------------------------------------------ Properties { //主色彩 || Main Color _MainColor("【主色彩】Main Color", Color) = (0.5,0.5,0.5,1) //漫反射紋理 || Diffuse Texture _MainTex("【紋理】Texture", 2D) = "white" {} //凹凸紋理 || Bump Texture _BumpMap("【凹凸紋理】Bumpmap", 2D) = "bump" {} //邊沿發光色彩 || Rim Color _RimColor("【邊沿發光色彩】Rim Color", Color) = (0.17,0.36,0.81,0.0) //邊沿發光強度 ||Rim Power _RimPower("【邊沿色彩強度】Rim Power", Range(0.6,36.0)) = 8.0 //邊沿發光強度系數 || Rim Intensity Factor _RimIntensity("【邊沿色彩強度系數】Rim Intensity", Range(0.0,100.0)) = 1.0 } //----------------------------------【子著色器 || SubShader】--------------------------------------- SubShader { //渲染類型為Opaque,不透明 || RenderType Opaque Tags { "RenderType" = "Opaque" } //-------------------------開啟CG著色器編程語言段 || Begin CG Programming Part---------------------- CGPROGRAM //【1】聲明使用蘭伯特光照模式 ||Using the Lambert light mode #pragma surface surf Lambert //【2】定義輸入結構 || Input Struct struct Input { //紋理貼圖 || Texture float2 uv_MainTex; //法線貼圖 || Bump Texture float2 uv_BumpMap; //視察方向 || Observation direction float3 viewDir; }; //【3】變量聲明 || Variable Declaration //邊沿色彩 float4 _MainColor; //主紋理 sampler2D _MainTex; //凹凸紋理 sampler2D _BumpMap; //邊沿色彩 float4 _RimColor; //邊沿色彩強度 float _RimPower; //邊沿色彩強度 float _RimIntensity; //【4】表面著色函數的編寫 || Writing the surface shader function void surf(Input IN, inout SurfaceOutput o) { //表面反射色彩為紋理色彩 o.Albedo = tex2D(_MainTex, IN.uv_MainTex).rgb*_MainColor.rgb; //表面法線為凹凸紋理的色彩 o.Normal = UnpackNormal(tex2D(_BumpMap, IN.uv_BumpMap)); //邊沿色彩 half rim = 1.0 - saturate(dot(normalize(IN.viewDir), o.Normal)); //計算出邊沿色彩強度系數 o.Emission = _RimColor.rgb * pow(rim, _RimPower)*_RimIntensity; } //-------------------結束CG著色器編程語言段 || End CG Programming Part------------------ ENDCG } //后備著色器為普通漫反射 || Fallback use Diffuse Fallback "Diffuse" }
略微揣摩1下就明白,此Shader其實就是用利用了Unity5中封裝好的Standard Surface Output結構體中的Emission(自發光)屬性,來到達這樣的邊沿光效果,技術含量很有限。這邊附1下Unity5中的SurfaceOutputStandard原型:
// Unity5 SurfaceOutputStandard原型: struct SurfaceOutputStandard { fixed3 Albedo; // 漫反射色彩 fixed3 Normal; // 切線空間法線 half3 Emission; //自發光 half Metallic; // 金屬度;取0為非金屬, 取1為金屬 half Smoothness; // 光澤度;取0為非常粗糙, 取1為非常光滑 half Occlusion; // 遮擋(默許值為1) fixed Alpha; // 透明度 };
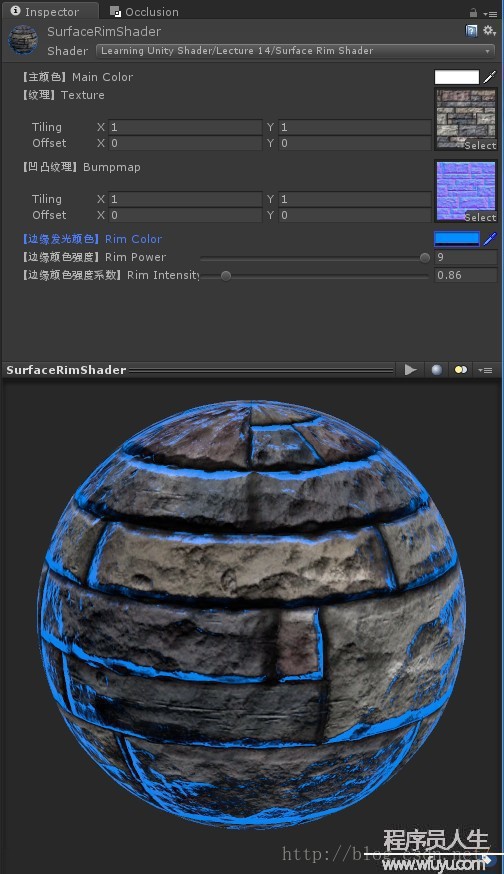
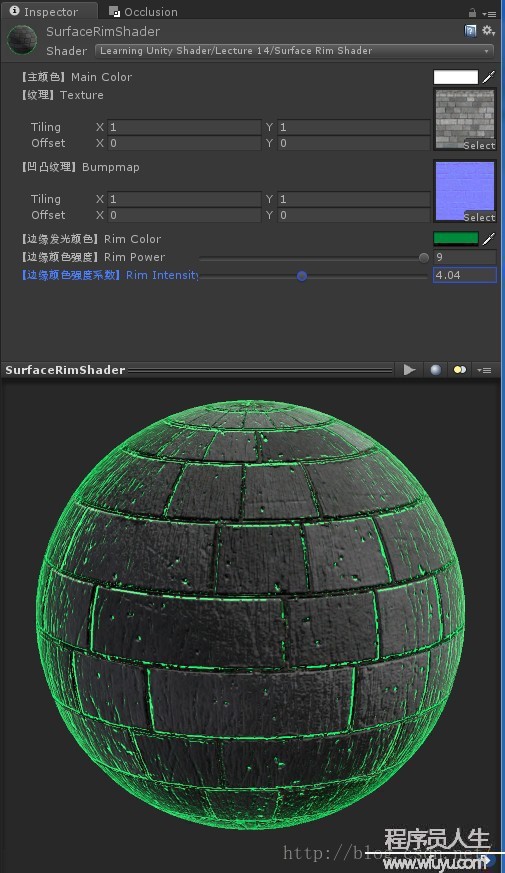
將此Shader賦給Material后在編輯器效果圖:
里面有6個參數,包括主色彩、紋理、凹凸紋理、邊沿發光色彩、邊沿色彩強度、邊沿色彩強度系數這6個參數可以定制與調理,只要貼圖資源到位,就很容易可以調出自己滿意的效果來。
4、可編程Shader版邊沿發光Shader的實現
這篇文章核心主要就是實現本節的這個可編程版(也就是Vertex & Fragment Shader)邊沿發光Shader。大家知道,Vertex & Fragment Shader是比Surface Shader更高1段位的實現形態,有更大的可控性,更好的可編程性,可以實現更加豐富的效果,是更貼近CG著色語言的1種Shader形態。
OK,直接貼出經過詳細注釋的Vertex & Fragment Shader版邊沿發光Shader實現源代碼:
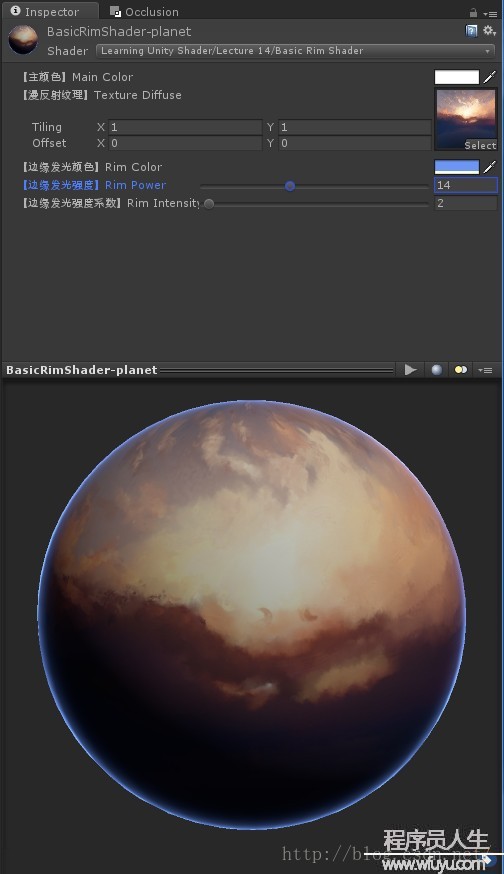
Shader "Learning Unity Shader/Lecture 14/Basic Rim Shader" { //-----------------------------------【屬性 || Properties】------------------------------------------ Properties { //主色彩 || Main Color _MainColor("【主色彩】Main Color", Color) = (0.5,0.5,0.5,1) //漫反射紋理 || Diffuse Texture _TextureDiffuse("【漫反射紋理】Texture Diffuse", 2D) = "white" {} //邊沿發光色彩 || Rim Color _RimColor("【邊沿發光色彩】Rim Color", Color) = (0.5,0.5,0.5,1) //邊沿發光強度 ||Rim Power _RimPower("【邊沿發光強度】Rim Power", Range(0.0, 36)) = 0.1 //邊沿發光強度系數 || Rim Intensity Factor _RimIntensity("【邊沿發光強度系數】Rim Intensity", Range(0.0, 100)) = 3 } //----------------------------------【子著色器 || SubShader】--------------------------------------- SubShader { //渲染類型為Opaque,不透明 || RenderType Opaque Tags { "RenderType" = "Opaque" } //---------------------------------------【唯1的通道 || Pass】------------------------------------ Pass { //設定通道名稱 || Set Pass Name Name "ForwardBase" //設置光照模式 || LightMode ForwardBase Tags { "LightMode" = "ForwardBase" } //-------------------------開啟CG著色器編程語言段 || Begin CG Programming Part---------------------- CGPROGRAM //【1】指定頂點和片斷著色函數名稱 || Set the name of vertex and fragment shader function #pragma vertex vert #pragma fragment frag //【2】頭文件包括 || include #include "UnityCG.cginc" #include "AutoLight.cginc" //【3】指定Shader Model 3.0 || Set Shader Model 3.0 #pragma target 3.0 //【4】變量聲明 || Variable Declaration //系統光照色彩 uniform float4 _LightColor0; //主色彩 uniform float4 _MainColor; //漫反射紋理 uniform sampler2D _TextureDiffuse; //漫反射紋理_ST后綴版 uniform float4 _TextureDiffuse_ST; //邊沿光色彩 uniform float4 _RimColor; //邊沿光強度 uniform float _RimPower; //邊沿光強度系數 uniform float _RimIntensity; //【5】頂點輸入結構體 || Vertex Input Struct struct VertexInput { //頂點位置 || Vertex position float4 vertex : POSITION; //法線向量坐標 || Normal vector coordinates float3 normal : NORMAL; //1級紋理坐標 || Primary texture coordinates float4 texcoord : TEXCOORD0; }; //【6】頂點輸出結構體 || Vertex Output Struct struct VertexOutput { //像素位置 || Pixel position float4 pos : SV_POSITION; //1級紋理坐標 || Primary texture coordinates float4 texcoord : TEXCOORD0; //法線向量坐標 || Normal vector coordinates float3 normal : NORMAL; //世界空間中的坐標位置 || Coordinate position in world space float4 posWorld : TEXCOORD1; //創建光源坐標,用于內置的光照 || Function in AutoLight.cginc to create light coordinates LIGHTING_COORDS(3,4) }; //【7】頂點著色函數 || Vertex Shader Function VertexOutput vert(VertexInput v) { //【1】聲明1個頂點輸出結構對象 || Declares a vertex output structure object VertexOutput o; //【2】填充此輸出結構 || Fill the output structure //將輸入紋理坐標賦值給輸出紋理坐標 o.texcoord = v.texcoord; //獲得頂點在世界空間中的法線向量坐標 o.normal = mul(float4(v.normal,0), _World2Object).xyz; //取得頂點在世界空間中的位置坐標 o.posWorld = mul(_Object2World, v.vertex); //獲得像素位置 o.pos = mul(UNITY_MATRIX_MVP, v.vertex); //【3】返回此輸出結構對象 || Returns the output structure return o; } //【8】片斷著色函數 || Fragment Shader Function fixed4 frag(VertexOutput i) : COLOR { //【8.1】方向參數準備 || Direction //視角方向 float3 ViewDirection = normalize(_WorldSpaceCameraPos.xyz - i.posWorld.xyz); //法線方向 float3 Normalection = normalize(i.normal); //光照方向 float3 LightDirection = normalize(_WorldSpaceLightPos0.xyz); //【8.2】計算光照的衰減 || Lighting attenuation //衰減值 float Attenuation = LIGHT_ATTENUATION(i); //衰減后色彩值 float3 AttenColor = Attenuation * _LightColor0.xyz; //【8.3】計算漫反射 || Diffuse float NdotL = dot(Normalection, LightDirection); float3 Diffuse = max(0.0, NdotL) * AttenColor + UNITY_LIGHTMODEL_AMBIENT.xyz; //【8.4】準備自發光參數 || Emissive //計算邊沿強度 half Rim = 1.0 - max(0, dot(i.normal, ViewDirection)); //計算出邊沿自發光強度 float3 Emissive = _RimColor.rgb * pow(Rim,_RimPower) *_RimIntensity; //【8.5】計在終究色彩中加入自發光色彩 || Calculate the final color //終究色彩 = (漫反射系數 x 紋理色彩 x rgb色彩)+自發光色彩 || Final Color=(Diffuse x Texture x rgbColor)+Emissive float3 finalColor = Diffuse * (tex2D(_TextureDiffuse,TRANSFORM_TEX(i.texcoord.rg, _TextureDiffuse)).rgb*_MainColor.rgb) + Emissive; //【8.6】返回終究色彩 || Return final color return fixed4(finalColor,1); } //-------------------結束CG著色器編程語言段 || End CG Programming Part------------------ ENDCG } } //后備著色器為普通漫反射 || Fallback use Diffuse FallBack "Diffuse" }相信很多朋友已看出來了,與普通的漫反射Shader相比,這個Shader的魔力就在于多出了“8.4準備自發光參數”和“8.5在終究色彩中加入自發光色彩"兩個步驟而已,前面都是普通的Vertex & Fragment Shader常規寫法。
將此Shader賦給Material,得到的效果以下:

固然,你也能夠將這兩個Shader用于場景中各種模型,以下是1組效果圖:
OK,這篇文章的內容大致如此。我們下篇文章,再會。
附: 本文配套源碼下載鏈接
【Github】本文Shader源碼

上一篇 Pnp管理器(2)
程序員人生,我編程,我富裕,記住wfuyu網,php教程,php學習,php手冊,CMS模版制作
聲明:本站大部分內容是作者原創,少部分收集于互聯網供大家一起學習,原版權很多不明,如有侵權請聯系本站,謝謝!
粵ICP備14040726號-1?? 2015-2020 程序員人生 版權所有