默認安裝forever-webui是不能通過外網訪問的,且進入管理界面也不需要密碼
相信很多同學都需要在外部網絡管理自己的nodejs服務~
于是乎想把forever-webui添加一個密碼驗證~
小弟不才,對nodejs還沒玩透,正巧之前是使用nginx端口轉發來實現多域名綁定的
所以這次也通過nginx來在中間加一層密碼驗證~
分為2步:
1.生成auth文件
參考該文:http://www.vpser.net/build/nginx-htpasswd.html
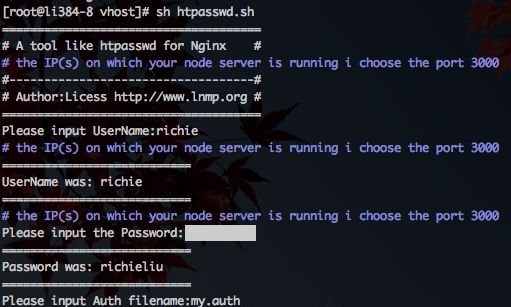
執行:wget -c soft.vpser.net/lnmp/ext/htpasswd.sh;bash htpasswd.sh
按提示輸入用戶名、密碼、及認證文件名。腳本會自動生成認證文件。記錄下腳本返回的文件路徑。如:/usr/local/nginx/conf/vpser.net.auth。

2.修改nginx conf文件
修改nginx配置文件 我這里是用的vhost
upstream app_node_hello { server 127.0.0.1:8085;#代理forever-webui的端口}# the nginx server instanceserver { listen 0.0.0.0:80; server_name nodejs.uedpark.com; # pass the request to the node.js server with the correct headers and much more can be added, see nginx config options location / { proxy_set_header X-Real-IP $remote_addr; proxy_set_header X-Forwarded-For $proxy_add_x_forwarded_for; proxy_set_header Host $http_host; proxy_set_header X-NginX-Proxy true; proxy_pass http://app_node_hello/; proxy_redirect off;#添加驗證 auth_basic "plese input forever web UI password:"; auth_basic_user_file /usr/local/nginx/conf/my.auth.conf; } }然后reload或restart nginx~
再次訪問forever-webui 顯示如下

至此,為forever-webui添加密碼驗證完成~沒有什么難度,只是提供一種思路而已~
歡迎大家交流分享~
參考資料:http://www.vxbq.cn/a/view/43018.html
