[置頂] 【Quartz】基于Spring注解方式配置Quartz
來源:程序員人生 發(fā)布時(shí)間:2015-05-20 10:24:16 閱讀次數(shù):3089次
林炳文Evankaka原創(chuàng)作品。轉(zhuǎn)載請注明出處http://blog.csdn.net/evankaka 在上講【Quartz】Spring3.2.9+Quqrtz2.2.1實(shí)現(xiàn)定時(shí)實(shí)例中,我們使用了XML的方式來配置Quartz定時(shí)任務(wù),雖然比用API的方式簡便多了,但是Spring還支持基本注解的方式來配置。這樣做不但更加簡單,而且代碼量也更加少了。
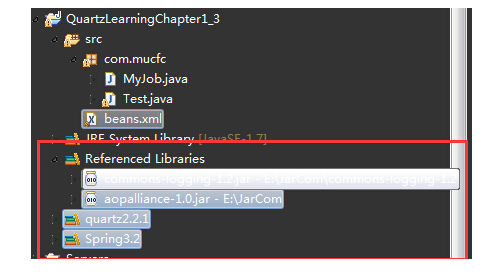
新建1個(gè)Java工程,導(dǎo)入要用到的包,Spring3.2、Quartz2.2.1、aopalliance⑴.0.jar、commons-logging⑴.2.jar。全部工程目錄以下:
1、配置需要調(diào)度的類,并添加注解package com.mucfc;
import java.text.SimpleDateFormat;
import java.util.Date;
import org.springframework.scheduling.annotation.Scheduled;
import org.springframework.stereotype.Component;
/**
*事件類,基于Spring注解方式
*作者 林炳文(ling20081005@126.com 博客:http://blog.csdn.net/evankaka)
*時(shí)間 2015.4.29
*/
@Component
public class MyJob {
public MyJob(){
System.out.println("MyJob創(chuàng)建成功");
}
@Scheduled(cron = "0/1 * * * * ? ")//每隔1秒隔行1次
public void run(){
System.out.println("Hello MyJob "+
new SimpleDateFormat("yyyy-MM-dd HH:mm:ss ").format(new Date()));
}
}
2、首先要配置我們的beans.xml,在xmlns 多加下面的內(nèi)容xmlns:task="http://www.springframework.org/schema/task"
3、然后xsi:schemaLocation多加下面的內(nèi)容 http://www.springframework.org/schema/task
http://www.springframework.org/schema/task/spring-task⑶.0.xsd
4、最后是我們的task任務(wù)掃描注解
<!--開啟這個(gè)配置,spring才能辨認(rèn)@Scheduled注解-->
<task:annotation-driven/>
5、自動配置掃描位置: <!-- 自動掃描注解的bean -->
<context:component-scan base-package="com.mucfc"/>
6、全部文檔以下<?xml version="1.0" encoding="UTF⑻"?>
<beans xmlns="http://www.springframework.org/schema/beans"
xmlns:xsi="http://www.w3.org/2001/XMLSchema-instance" xmlns:context="http://www.springframework.org/schema/context"
xmlns:p="http://www.springframework.org/schema/p" xmlns:task="http://www.springframework.org/schema/task"
xsi:schemaLocation="http://www.springframework.org/schema/beans
http://www.springframework.org/schema/beans/spring-beans⑶.0.xsd
http://www.springframework.org/schema/context
http://www.springframework.org/schema/context/spring-context⑶.0.xsd
http://www.springframework.org/schema/task
http://www.springframework.org/schema/task/spring-task⑶.0.xsd">
<!--開啟這個(gè)配置,spring才能辨認(rèn)@Scheduled注解-->
<task:annotation-driven/>
<!-- 自動掃描注解的bean -->
<context:component-scan base-package="com.mucfc"/>
</beans>
7、使用package com.mucfc;
import org.springframework.context.ApplicationContext;
import org.springframework.context.support.ClassPathXmlApplicationContext;
public class Test {
public static void main(String[] args) {
// TODO Auto-generated method stub
ApplicationContext context=new ClassPathXmlApplicationContext("beans.xml");
}
}
輸出結(jié)果:
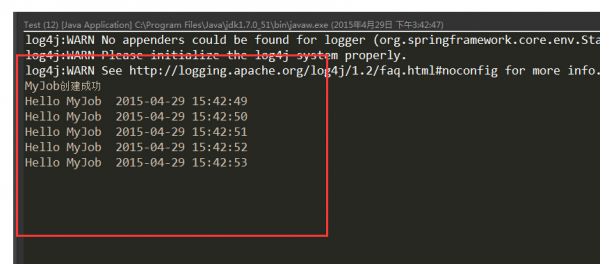
1旦這個(gè)xml被加載進(jìn)來來,就會自動創(chuàng)建bean的實(shí)例,并且開始定時(shí)任務(wù)了
需要注意的幾點(diǎn):
1、spring的@Scheduled注解 需要寫在實(shí)現(xiàn)上
2、 定時(shí)器的任務(wù)方法不能有返回值(如果有返回值,spring初始化的時(shí)候會告知你有個(gè)毛病、需要設(shè)定1個(gè)proxytargetclass的某個(gè)值為true、具體就去百度google吧)
3、實(shí)現(xiàn)類上要有組件的注解@Component林炳文Evankaka原創(chuàng)作品。轉(zhuǎn)載請注明出處http://blog.csdn.net/evankaka
生活不易,碼農(nóng)辛苦
如果您覺得本網(wǎng)站對您的學(xué)習(xí)有所幫助,可以手機(jī)掃描二維碼進(jìn)行捐贈


