Android讀取網絡圖片
來源:程序員人生 發布時間:2014-11-08 08:08:04 閱讀次數:3364次
本文是自己學習所做筆記,歡迎轉載,但請注明出處:http://blog.csdn.net/jesson20121020
在android4.0以后,已不允許在主線程中進行網絡要求操作了, 否則會出現NetworkOnMainThreadException異常。而為了解決在android4.0之上可以進行網絡的要求,可以有兩種方法來解決,以讀取網絡的圖片為例,先看效果圖:
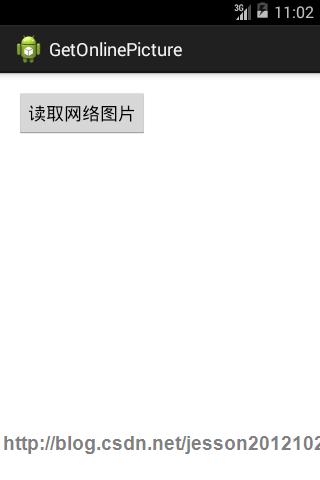

當點擊按鈕時,會將指定地址的網絡圖片加載在imageVIew中進行顯示。
讀取網絡圖片:
1. 取得指定地址網絡圖片數據
有兩種方式將指定地址的網絡讀取到Bitmap中,然后通過imageView加載顯示。
1). 將輸入流解碼成Bitmap
private static String path = "http://221.203.108.70:8080/jxzy/UploadFiles_4517/201005/2010052615165701.jpg";
public Bitmap getData(){
Bitmap bitmap = null;
try {
URL url = new URL(path);
URLConnection conn = url.openConnection();
conn.connect();
InputStream is = conn.getInputStream();
bitmap = BitmapFactory.decodeStream(is);
} catch (MalformedURLException e) {
// TODO Auto-generated catch block
e.printStackTrace();
} catch (IOException e) {
// TODO Auto-generated catch block
e.printStackTrace();
}
return bitmap;
}
2). 通過字節數據將輸入流寫入到輸入流中,并通過BitmapFactory.decodeByteArray()方法將其轉換成Bitmap
public Bitmap getData1(){
Bitmap bitmap = null;
ByteArrayOutputStream bos = null;
try {
URL url = new URL(path);
URLConnection conn = url.openConnection();
InputStream is = conn.getInputStream();
bos = new ByteArrayOutputStream();
byte[] data = new byte[1024];
int len = 0;
while((len = is.read(data))!= ⑴){
bos.write(data, 0, len);
}
byte[] data1 = bos.toByteArray();
bitmap = BitmapFactory.decodeByteArray(bos.toByteArray(), 0, data1.length);
} catch (IOException e) {
// TODO Auto-generated catch block
e.printStackTrace();
}
return bitmap;
}
2. 將得到的Bitmap裝載在imageView中顯示。
開始也提到了,在android4.0之上不就不能在主線程中直接進行網絡要求等操作了,因此為了將網絡圖片加載到ImageView中,也有兩種方法,具體以下:
方法1:不新建線程;
直接在onCreate()方法中加入以下兩行代碼,然后直接在主線程中進行讀取網絡圖片的操作。
StrictMode.setThreadPolicy(new StrictMode.ThreadPolicy.Builder().detectDiskReads().detectDiskWrites().detectNetwork().penaltyLog().build());
StrictMode.setVmPolicy(new StrictMode.VmPolicy.Builder().detectLeakedSqlLiteObjects().detectLeakedClosableObjects().penaltyLog().penaltyDeath().build());
有了這兩行代碼,固然了,這些只適用android4.0之上,你如果targetSDK在4.0之下,也能夠不加這兩行代碼,直接在主線程中進行讀取網絡圖片的操作,但是這類方法其實不推薦。
接下來就是將第1步兩種方法得到Bitmap加載到imageView中,主要代碼以下:
imageView = (ImageView)findViewById(R.id.imageView);
button = (Button)findViewById(R.id.button);
button.setOnClickListener(new OnClickListener() {
@Override
public void onClick(View v) {
// TODO Auto-generated method stub
imageView.setImageBitmap(getData());
}
});
方法2: 利用Thread+Handler
由于,android也不允許在非UI線程中更新UI,所以不能直接將imageView.setImageBitmap()寫在線程中,這就要借助于Handler了,由于Handler是運行在主線程中的,所以在讀取網絡數據利用Message消息來通知Handler來通知更新UI。主要代碼以下:
Handler handler = new Handler(){
public void handleMessage(Message msg) {
if(msg.what == 1){
imageView.setImageBitmap(mBitmap);
}
};
};
Runnable runnable = new Runnable() {
@Override
public void run() {
// TODO Auto-generated method stub
Message msg = new Message();
msg.what = 1;
//mBitmap = getData();
mBitmap = getData1();
handler.sendMessage(msg);
}
};
接下來,就是在按鈕的單擊事件中新建1個線程并啟動便可。
button = (Button)findViewById(R.id.button);
button.setOnClickListener(new OnClickListener() {
@Override
public void onClick(View v) {
// TODO Auto-generated method stub
new Thread(runnable).start();
}
});
最后,給出布局文件,以下:
<RelativeLayout xmlns:android="http://schemas.android.com/apk/res/android"
xmlns:tools="http://schemas.android.com/tools"
android:layout_width="match_parent"
android:layout_height="match_parent"
android:paddingBottom="@dimen/activity_vertical_margin"
android:paddingLeft="@dimen/activity_horizontal_margin"
android:paddingRight="@dimen/activity_horizontal_margin"
android:paddingTop="@dimen/activity_vertical_margin"
tools:context=".MainActivity" >
<Button
android:id="@+id/button"
android:layout_width="wrap_content"
android:layout_height="wrap_content"
android:text="讀取網絡圖片"
/>
<ImageView
android:id="@+id/imageView"
android:layout_width="match_parent"
android:layout_height="wrap_content"
/>
</RelativeLayout>
生活不易,碼農辛苦
如果您覺得本網站對您的學習有所幫助,可以手機掃描二維碼進行捐贈


