OpenLayers跨域請求WFS服務在Tomcat環境下的實現
來源:程序員人生 發布時間:2014-10-09 02:39:02 閱讀次數:2680次
由于項目的地圖數據放在不同的服務器上面,因此進行POI搜索和路徑導航的時候需要進行跨域檢索,容器環境用的是Tomcat 7.0.53.配置跨域請求的步驟為:
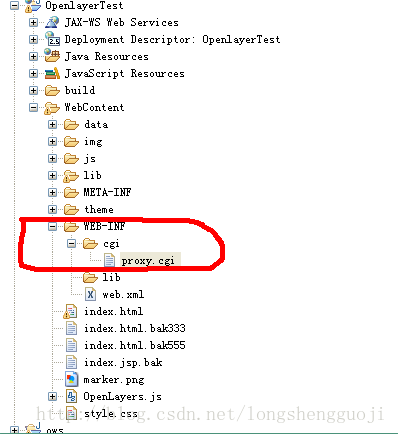
1. 下載Proxy.cgi,或者到Openlayers的安裝目錄中,安裝盤符OpenLayers-2.13.1examples中查找,或者直接拷貝本文下面的代碼到proxy.cgi文件中。并修改allowedHosts,添加需要訪問的遠程服務器地址:端口和本地IP地址:端口。最后把proxy.cgi文件放在CGI文件夾中,拷貝到網站WEB-INF目錄下,如圖所示
下面是proxy.cgi源碼,其中192.168.1.18:8090','192.168.1.50:8080','192.168.1.49:8080','192.168.1.18:8080','localhost:8090'是本文添加的遠程服務器地址和本地地址。
#!/usr/bin/envpython
"""Thisis a blind proxy that we use to get around browser
restrictionsthat prevent the Javascript from loading pages not on the
sameserver as the Javascript. This hasseveral problems: it's less
efficient,it might break some sites, and it's a security risk because
peoplecan use this proxy to browse the web and possibly do bad stuff
withit. It only loads pages via http andhttps, but it can load any
contenttype. It supports GET and POST requests."""
importurllib2
importcgi
importsys, os
#Designed to prevent Open Proxy type stuff.
allowedHosts= ['www.openlayers.org', 'openlayers.org',
'labs.metacarta.com','world.freemap.in',
'prototype.openmnnd.org','geo.openplans.org',
'sigma.openplans.org', 'demo.opengeo.org',
'www.openstreetmap.org','sample.azavea.com',
'v2.suite.opengeo.org','v-swe.uni-muenster.de:8080',
'vmap0.tiles.osgeo.org','www.openrouteservice.org',
'maps.wien.gv.at','192.168.1.18:8090','192.168.1.50:8080','192.168.1.49:8080','192.168.1.18:8080','localhost:8090']
method= os.environ["REQUEST_METHOD"]
ifmethod == "POST":
qs = os.environ["QUERY_STRING"]
d = cgi.parse_qs(qs)
if d.has_key("url"):
url = d["url"][0]
else:
url ="http://www.openlayers.org"
else:
fs = cgi.FieldStorage()
url = fs.getvalue('url',"http://www.openlayers.org")
try:
host = url.split("/")[2]
if allowedHosts and not host inallowedHosts:
print "Status: 502 BadGateway"
print "Content-Type:text/plain"
print
print "This proxy does not allowyou to access that location (%s)." % (host,)
print
print os.environ
elif url.startswith("http://") orurl.startswith("https://"):
if method == "POST":
length =int(os.environ["CONTENT_LENGTH"])
headers ={"Content-Type": os.environ["CONTENT_TYPE"]}
body = sys.stdin.read(length)
r = urllib2.Request(url, body,headers)
y = urllib2.urlopen(r)
else:
y = urllib2.urlopen(url)
# print content type header
i = y.info()
if i.has_key("Content-Type"):
print "Content-Type: %s"% (i["Content-Type"])
else:
print "Content-Type:text/plain"
print
print y.read()
y.close()
else:
print "Content-Type:text/plain"
print
print "Illegal request."
exceptException, E:
print "Status: 500 UnexpectedError"
print "Content-Type: text/plain"
print
print "Some unexpected error occurred.Error text was:", E
2. 修改tomcat配置文件web.xml,很多代碼的該文件中是存在的,只不過是添加了注釋,把注釋去掉即可。修改如下
<servlet>
<servlet-name>cgi</servlet-name>
<servlet-class>org.apache.catalina.servlets.CGIServlet</servlet-class>
<init-param>
<param-name>debug</param-name>
<param-value>0</param-value>
</init-param>
<init-param>
<param-name>cgiPathPrefix</param-name>
<param-value>WEB-INF/cgi</param-value>
</init-param>
<init-param>
<param-name>executable</param-name>
<param-value>C:/Python27/python.exe</param-value>
</init-param>
<init-param>
<param-name>passShellEnvironment</param-name>
<param-value>true</param-value>
</init-param>
<load-on-startup>5</load-on-startup>
</servlet>
<!-- ================ Built In Servlet Mappings ========================= -->
<!-- The servlet mappings for the built in servlets defined above. Note -->
<!-- that, by default, the CGI and SSI servlets are *not* mapped. You -->
<!-- must uncomment these mappings (or add them to your application's own -->
<!-- web.xml deployment descriptor) to enable these services -->
<!-- The mapping for the default servlet -->
<servlet-mapping>
<servlet-name>default</servlet-name>
<url-pattern>/</url-pattern>
</servlet-mapping>
<servlet-mapping>
<servlet-name>cgi</servlet-name>
<url-pattern>/cgi/*</url-pattern>
</servlet-mapping>
其中有一個節點要注意,該節點配置了Python的路徑,如果電腦沒有安裝python需要安裝,并且配置好路徑。
<init-param>
<param-name>executable</param-name>
<param-value>C:/Python27/python.exe</param-value>
</init-param>
3. 修改tomcat配置目錄中content.xml文件,在Content節點中添加privileged="true"屬性。
<?xml version='1.0' encoding='utf-8'?>
<!--
Licensed to the ApacheSoftware Foundation (ASF) under one or more
contributor licenseagreements. See the NOTICE filedistributed with
this work for additionalinformation regarding copyright ownership.
The ASF licenses thisfile to You under the Apache License, Version 2.0
(the"License"); you may not use this file except in compliance with
the License. You may obtain a copy of the License at
http://www.apache.org/licenses/LICENSE-2.0
Unless required byapplicable law or agreed to in writing, software
distributed under theLicense is distributed on an "AS IS" BASIS,
WITHOUT WARRANTIES ORCONDITIONS OF ANY KIND, either express or implied.
See the License for thespecific language governing permissions and
limitations under theLicense.
-->
<!-- The contents of this file will be loaded for each webapplication -->
<Context privileged="true">
<!-- Default set ofmonitored resources -->
<WatchedResource>WEB-INF/web.xml</WatchedResource>
<!-- Uncomment thisto disable session persistence across Tomcat restarts -->
<!--
<Managerpathname="" />
-->
<!-- Uncomment thisto enable Comet connection tacking (provides events
on sessionexpiration as well as webapp lifecycle) -->
<!--
<ValveclassName="org.apache.catalina.valves.CometConnectionManagerValve"/>
-->
</Context>
4. 配置完成,開始你的跨域訪問吧。
生活不易,碼農辛苦
如果您覺得本網站對您的學習有所幫助,可以手機掃描二維碼進行捐贈


